Imagine walking into a room bathed in a soft, ethereal glow, emanating subtly from above, creating an ambiance that is both sophisticated and inviting. This isn’t a luxury reserved for high-end interior designers; it’s an achievable DIY project that can dramatically elevate your home’s aesthetic: installing LED strip lights behind crown molding. Whether you’re aiming for a cozy bedroom retreat, a modern living room accent, or simply enhanced general lighting, integrating LED strips with crown molding offers a unique blend of style and functionality. With the right approach and a few essential tools, you can transform your ceilings into a captivating source of indirect illumination, bringing a new dimension of light and personality to any space.
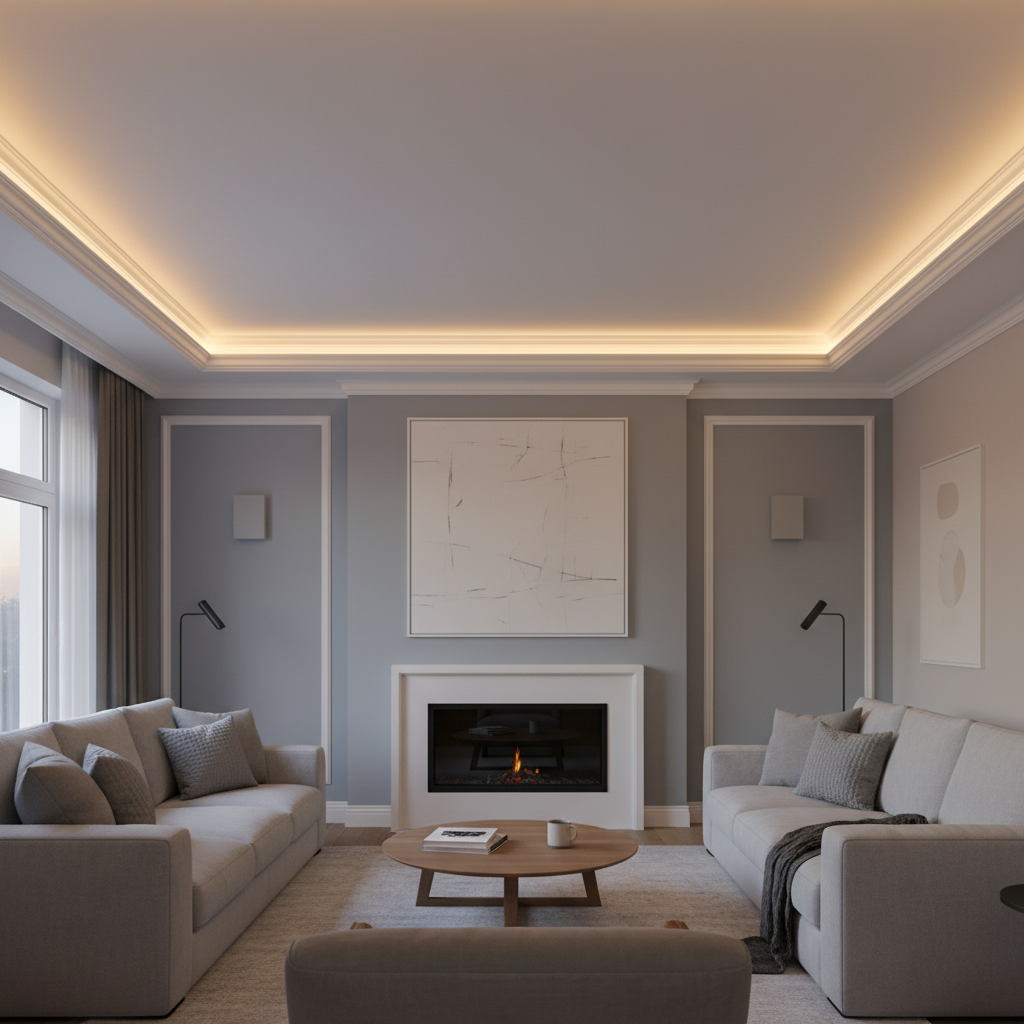
Elevate Your Space: Why Crown Molding LED Lighting is a Game-Changer
LED strip lighting integrated with crown molding, often referred to as “cove lighting,” creates a stunning indirect lighting effect that diffuses light across the ceiling, eliminating harsh glares and shadows. This technique offers a seamless, sophisticated glow, making rooms feel larger, more open, and undeniably elegant. It’s not just about aesthetics; it’s about crafting an atmosphere.
The appeal lies in several key advantages. Energy efficiency is paramount, as LED strips consume significantly less power than traditional bulbs, leading to noticeable savings on your electricity bill while being environmentally friendly. These lights boast an impressive longevity, often lasting tens of thousands of hours, which means less frequent replacements and maintenance. From a design perspective, the flexibility of LED strips is unmatched. Available in various color temperatures—from warm white for a cozy feel to cool white for a modern edge, and even full RGB for dynamic color changes—they allow you to customize your room’s mood at will. Their slim profile and adhesive backing make them remarkably easy to install in discreet locations like behind crown molding. Finally, LED strips are safe to use; they produce minimal heat and contain no harmful chemicals, making them an excellent choice for any home environment.
Preparing for Success: Choosing the Right LED Strips and Tools
A successful crown molding LED installation hinges on selecting the appropriate materials and having the right tools at hand. This stage sets the foundation for both the aesthetic appeal and the longevity of your lighting project.
Selecting Your LED Strips
Choosing the right LED strip involves several considerations:
- Voltage (12V vs. 24V): 12V strips are common for shorter runs (under 16 feet), while 24V strips are ideal for longer stretches, as they experience less voltage drop, ensuring consistent brightness along the entire length.
- Brightness (Lumens per Meter): For ambient, indirect lighting behind crown molding, strips ranging from 300 to 600 lumens per meter are generally suitable. If you desire a brighter effect or plan to use them as a primary light source, consider 600+ lumens per meter.
- Color Temperature/RGB: Decide on the ambiance. Warm white (2700K-3000K) creates a cozy, inviting atmosphere. Cool white (4000K-6500K) offers a modern, crisp look. RGB (Red, Green, Blue) strips allow for a full spectrum of colors, offering dynamic lighting control and mood-setting capabilities.
- Density (LEDs per Meter): Higher LED density (e.g., 60, 90, or 120 LEDs per meter) results in a smoother, more continuous light output, minimizing visible “hot spots” or individual LED dots, which is crucial for indirect lighting where the source is hidden.
- IP Rating: For typical dry interior rooms, an IP20 rating is sufficient. If installing in areas like bathrooms or kitchens where moisture might be present, opt for IP44 or IP65 rated strips for water resistance.
- Adhesive Quality: The quality of the adhesive backing is vital. Look for strips with genuine 3M VHB (Very High Bond) adhesive for a strong, lasting bond to your backer board.
|
Our Picks for the Best LED strip light in 2026
As an Amazon Associate I earn from qualifying purchases.
|
||
| Num | Product | Action |
|---|---|---|
| 1 | KSIPZE 100ft Led Strip Lights RGB Music Sync Color Changing Led Lights with Smart App Control Remote Led Lights for Bedroom Room Lighting Flexible Home Décor |

|
| 2 | DAYBETTER Led Strip Lights 32.8ft Kit with Remote and Power Supply Color Changing |
|
| 3 | Govee RGBIC LED Strip Lights, Smart LED Lights for Bedroom, Bluetooth LED Lights APP Control, DIY Multiple Colors on One Line, Color Changing LED Strip Lighting Music Sync, Home Decor, 16.4ft |
|
| 4 | dalattin White LED Strip Lights, 20ft Dimmable Super Bright 24V Led Tape Light 6500K 360 LEDs Lights for Bedrooms, Mirror, Kitchen, Home Decoration Daylight White |
|
| 5 | Govee 100ft RGBIC LED Strip Lights, Smart LED Lights Work with Alexa and Google Assistant, LED Lights for Bedroom WiFi App Control Segmented DIY Multiple Colors, Color Changing Light, (2 x 50ft) |
|
| 6 | Govee White LED Strip Lights, Upgraded 16.4ft Dimmable LED Light Strip 6500K Bright Daylight White, Strong Adhesive, 300 LEDs Flexible Tape Lights for Mirror, Kitchen Cabinet, Bedroom, Christmas Decor |
|
| 7 | White Led Strip Lights for Bedroom Small Dimmable LED Lights Strip 16.4ft Super Bright Flexible LED Tape Lights Rope Light for for Room Home Decor Luces Leds for Living Room Kitchen Vanity Mirror |
|
| 8 | Barrina (6 Pack LED T5 Integrated Single Fixture, 4FT, 2200lm, 6500K Super Bright White, 20W Utility LED Shop Light, Ceiling and Under Cabinet Light, Corded Electric with ON/Off Switch, ETL Listed |
|
| 9 | NBBUFF Led Lights for Bedroom 50ft (1 Roll), Color Changing RGB Led Strip Lights with 60 Keys Remote and App Control, Music Sync Led Lights for Room Kitchen Party Home Decor |
|
| 10 | DAYBETTER LED Strip Lights 110ft, Smart Lighting Strips with App Remote Control, RGB Music Sync Color Changing Lights for Bedroom Kitchen Party Home Decor Luces led para cuarto (1 Roll) |
|
Essential Tools & Materials
Here’s a list of what you’ll need for your DIY installation:
| Tool/Material | Purpose |
|---|---|
| Measuring Tape | Accurate room perimeter and cutting measurements |
| Pencil & Level | Marking reference lines for backer board placement |
| Stud Finder | Locating wall studs for secure backer board attachment |
| Miter Saw | Precise angle cuts for crown molding and backer board |
| Brad Nailer / Screws | Securing backer board and crown molding to the wall |
| Drill | Pilot holes, electrical box installation |
| Wire Cutters/Strippers | For electrical connections |
| Caulk Gun & Caulk | Finishing seams and gaps |
| Safety Glasses | Eye protection during cutting and drilling |
| Backer Board/Spacer | Provides a flat surface for LED strips and molding support (e.g., 1×2 pine, MDF, or ripped 2×4) |
| LED Strip Lights | Your chosen lighting solution |
| Power Supply/Transformer | Converts AC to DC voltage for LED strips |
| Compatible Dimmer Switch | For brightness control (ensure “low-voltage compatible”) |
| Electrical Wire | For connecting power (if adding new outlets/switches) |
| Old-Work Electrical Boxes | If installing new outlets/switches for the lighting |
The DIY Blueprint: Step-by-Step Installation Guide
Installing LED strips with crown molding is a manageable DIY project that adds significant value. Follow these steps for a successful transformation.
Phase 1: Planning and Measurement
Before any cutting or drilling, careful planning is essential. Start by measuring the entire perimeter of the room where the crown molding will be installed. This will determine the total length of LED strips and backer board required. Next, mark a consistent reference line on the wall, typically 5 to 8 inches down from the ceiling, to indicate the bottom edge of your backer board. Using a long level or a wood block cut to your desired distance from the ceiling as a marking gauge can ensure your lines are perfectly straight, even if the ceiling itself is uneven. Plan your power access: will you use an existing outlet, or do you need to install a new switch or a hidden receptacle behind the molding? Map out the ideal location for your power supply/transformer, ensuring it’s accessible but discreet.
Phase 2: Installing the Backer Board
The backer board (or spacer strip) serves as the foundation for both your LED strips and the crown molding. Cut your chosen material (e.g., 1×2 pine or a ripped 2×4) to length, mitering corners as needed. Using a stud finder, locate and mark the wall studs along your reference line. Attach the backer board securely to the wall studs using screws or a brad nailer, ensuring it is level and flush against the wall. If your power supply is bulky, you may need to notch out a section of the backer board to accommodate it, keeping it hidden from view. This board provides a flat surface for LED adhesion and a sturdy anchor for the crown molding.
Phase 3: Electrical Connections (If Needed)
If your project requires new electrical outlets or a switch, this is the time to install them. Turn off power at the circuit breaker. Cut holes for old-work electrical boxes at your planned locations, running new electrical wire from the power source (e.g., an existing light switch) to the new box. Connect the wires according to local electrical codes, ensuring proper grounding. It’s crucial that any dimmer switch you install is “low-voltage compatible” with LED strips, not just a generic “LED compatible” switch, to prevent flickering or damage. Once connections are made, temporarily turn the power back on to test the outlet or switch before proceeding.
Phase 4: Pre-Testing and Attaching LED Strips
This is a critical step that many DIYers overlook. Before permanent installation, unroll your entire LED strip and connect it to its power supply. Test all functionalities, including brightness levels, color changes (if RGB), and dimmer operation. This ensures your strips are working correctly before they are adhered. Once tested, begin attaching the LED strips to the narrow face of your installed backer board, positioning them to shine upwards towards the ceiling. Start near your power source connection. Carefully peel back a few inches of the adhesive backing at a time, pressing the strip firmly onto the backer board. For long runs, try to use continuous strips where possible to maintain consistent color and brightness. If multiple strips are needed, ensure connections are secure and well-insulated. Cut strips only at designated marks to avoid damaging the circuit.
Phase 5: Mounting the Crown Molding
Now it’s time to install the crown molding itself. Measure and cut your crown molding pieces, paying close attention to accurate miter cuts for inside and outside corners. Many professionals recommend “cutting crown molding upside down” on a miter saw, treating the saw’s table as the ceiling and the fence as the wall, which simplifies angle calculations. Secure the crown molding to the installed backer board using a brad nailer, driving nails into the backer board for a strong hold. Ensure the molding is tightly pressed against the wall and ceiling to minimize gaps. The molding’s angle should naturally create a cavity behind it where your LED strips are nestled, diffusing light upwards.
Phase 6: Finishing Touches and Final Testing
Once the crown molding is installed, fill any nail holes with wood putty and caulk all seams where the molding meets the wall or ceiling for a seamless, professional finish. Allow putty and caulk to dry completely before painting your molding to match your room’s trim. Finally, connect your LED strips to the power supply, if not already done, and perform a comprehensive final test of the entire system. Check all light segments, dimming functions, and color modes to ensure everything is operating flawlessly.
Mastering the Art: Tips for a Flawless Finish
Even with a detailed guide, a DIY project can present challenges. Knowing a few expert tips can help you achieve professional results and avoid common pitfalls.
For achieving a truly smooth, continuous light effect, especially with indirect lighting, consider using LED strips with a higher density of LEDs per meter. Lower density strips might result in visible “spotting” where individual LEDs are discernible, which can detract from the desired ambiance. Another tip for flawless installation is to always test your LED strips before applying them permanently. The adhesive is incredibly strong, and removing a faulty strip can be frustrating and even damage your wall paint. If you’re working with a room that requires multiple runs of LED strips, try to keep the lengths as equal as possible from the transformer. This helps ensure consistent color and brightness across the entire room, as longer runs can sometimes experience slight voltage drops.
Common issues include uneven lighting, strips not adhering, and electrical problems. Uneven lighting often stems from voltage drop on long runs; using 24V strips or adding power injection points can mitigate this. If strips aren’t adhering, ensure the backer board surface is clean, dry, and smooth before application. For persistent issues, reinforce with small adhesive clips designed for LED strips. Electrical problems like flickering or complete power failure usually point to incompatible power supplies or dimmer switches, loose connections, or exceeding the power supply’s wattage capacity. Always double-check component compatibility and wiring.
Maintaining your LED crown molding lighting is relatively simple. Dust the strips periodically to prevent dust buildup from dimming the light output. Ensure the power supply is in a well-ventilated area to prevent overheating and extend its lifespan. With proper installation and care, your LED crown molding lighting will provide years of beautiful, ambient illumination.
Conclusion
Installing LED strip lights on crown molding is a remarkably rewarding DIY project that transforms any room with elegant, indirect lighting. From the initial planning and selection of the right components to the final touches and troubleshooting, each step contributes to creating a personalized and inviting atmosphere. The benefits are clear: energy efficiency, impressive longevity, and unparalleled flexibility in design and mood setting. By carefully following the steps outlined, you can achieve a professional-looking installation that enhances your home’s aesthetic appeal and functionality. So, are you ready to elevate your living space with the soft, ambient glow of crown molding LED lighting?
Frequently Asked Questions
What type of LED strip lights are best for crown molding?
For crown molding, flexible 12V or 24V LED strips with a high density (60-120 LEDs/meter) are ideal for a smooth, even glow. Choose brightness (300-600 lumens/meter) and color temperature (warm, cool, or RGB) based on your desired ambiance. Ensure the adhesive is strong, like 3M VHB, for lasting adhesion.
How much space do I need behind crown molding for LED strips?
You typically need a minimum of 1-2 inches of clear space behind the crown molding. This cavity allows for proper light diffusion upwards onto the ceiling and provides enough room to comfortably install the LED strips and any necessary wiring. Deeper cavities can create a softer, more diffused light.
Can I install LED strips with existing crown molding?
Yes, it’s possible to install LED strips with existing crown molding. You’ll likely need to add a backer board or spacer strip behind the molding to create a flat surface for the LEDs and an upward angle for light projection. Ensure there’s adequate space for the strips and wiring without damaging the existing trim.
Do I need a special dimmer switch for LED strip lights?
Yes, you need a “low-voltage compatible” dimmer switch, not just a standard dimmer or one labeled “LED compatible.” Generic dimmers can cause flickering, buzzing, or damage to your LED strips. Always check the dimmer’s specifications to ensure it’s designed to work with your specific LED power supply/transformer.
How do I hide the wires and power supply for crown molding LEDs?
Wires can be routed behind the crown molding and backer board. For the power supply/transformer, you can create a small notch in the backer board to recess it, or locate it in an inconspicuous area like a corner or inside a nearby cabinet. Consider using a hidden wall outlet behind the molding for a clean finish.
How do I ensure even light distribution along long runs?
For long runs, using 24V LED strips helps minimize voltage drop and maintain consistent brightness. If using 12V strips on extended lengths, you might need to implement “power injection” by running additional wires to inject power at different points along the strip, preventing dimming towards the end. High-density strips also help.