LED strip lights have transformed how we illuminate our spaces, offering unparalleled flexibility and vibrant ambiance. However, even the best LED strips can occasionally develop a “dead section” where a segment inexplicably goes dark. This common issue can be frustrating, but before you discard your entire lighting setup, know that many such problems are surprisingly simple to diagnose and fix yourself. With the right approach and a few basic tools, you can bring your LED strips back to life and restore your brilliant lighting design.
LED Strip Light: Overview and Applications
LED strip lights, also known as LED tape or ribbon lights, are highly versatile lighting solutions consisting of light-emitting diodes mounted on a flexible circuit board. These strips typically come with an adhesive backing for easy installation and can be cut at designated points to fit various lengths. Each segment of the strip contains several LEDs, resistors, and connection pads, forming a circuit. They operate on low voltage, usually 12V or 24V DC, and require a power supply unit (driver) to convert mains electricity. From enhancing kitchen under-cabinet lighting and accentuating architectural features to creating dynamic mood lighting in entertainment areas and eye-catching retail displays, LED strip lights are a staple for both functional and decorative illumination.
Superior Advantages of LED Strip Lights
LED strip lights offer a host of benefits that make them a popular choice for modern lighting projects. Their exceptional energy efficiency means they consume significantly less power compared to traditional incandescent or fluorescent lighting, leading to lower electricity bills. With an impressive longevity, often rated for 50,000 hours or more, they require minimal maintenance and replacement, providing years of reliable illumination. The flexibility of the strips allows them to conform to curved surfaces and fit into tight spaces, opening up endless design possibilities. Furthermore, the diversity in color and effects—from single-color options to full RGB and tunable white —enables users to create dynamic and personalized lighting schemes. They are also safer to use, as they operate at low temperatures, reducing the risk of burns, and are free from harmful chemicals like mercury.
Comparison Table of Popular LED Strip Lights
Understanding the basic types of LED strip lights can help in both selection and troubleshooting, as different specifications might influence how you approach a repair. Here’s a general comparison:
| Type of LED Strip | Voltage | Features | Common Use | Repairability Note |
|---|---|---|---|---|
| Single Color | 12V/24V | Constant, uniform light in one color | Task lighting, accent lighting, subtle ambiance | Often simpler circuits, repairs usually involve cutting and reconnecting the two power lines. |
| RGB | 12V/24V | Multiple colors, color-changing effects | Mood lighting, entertainment areas, decorative | More complex wiring (4 pins: R, G, B, V+), requiring compatible connectors for repair. |
| Tunable White | 12V/24V | Adjustable warm to cool white tones | Dynamic task lighting, customizable white light | Similar to RGB in complexity (often 3 pins: Warm White, Cool White, V+), requiring correct pin alignment. |
| RGBW/RGBIC | 12V/24V | RGB plus a dedicated white LED, or individually addressable LEDs | Advanced mood lighting, intricate effects, smart home integration | Most complex, RGBW has 5 pins (R, G, B, W, V+), RGBIC requires specific segment replacement or advanced circuit repair due to individual chip control. |
Guide to Choosing the Right LED Strip Light (Buying Guide)
Selecting the appropriate LED strip light for your project is crucial, not only for aesthetics but also for long-term performance and reliability, which can help prevent premature issues like dead sections. First, determine your usage needs: Consider the purpose (task, accent, mood lighting) and the installation environment (indoor, outdoor, wet locations require IP-rated strips). Next, choose the right specifications: Pay attention to voltage (12V for shorter runs, 24V for longer runs to minimize voltage drop), color temperature or RGB capabilities, and brightness (lumens per meter) to match your desired output. Always prioritize quality: Opt for reputable brands that provide clear specifications and certifications (e.g., UL, CE, RoHS). Check user reviews and product warranties. While online shopping offers convenience, read product descriptions thoroughly, especially regarding power requirements, compatibility with controllers/dimmers, and return policies. Investing in a quality strip and compatible accessories upfront can save you significant repair headaches down the line.
Reputable LED Strip Light Brands on the Market
The LED strip light market is vast, with many manufacturers offering a wide range of products. When purchasing, especially with an eye towards reliability and ease of maintenance, considering well-known brands is a smart move. Brands like Philips Hue are renowned for their smart home integration and high-quality, though often premium-priced, RGBW strips. Govee specializes in innovative RGBIC strips with advanced control features and vibrant effects. For more professional-grade and traditional applications, brands such as HitLights, LEDVANCE (Sylvania), and LIFX offer robust and dependable single-color and tunable white options. These brands typically provide better quality components, more consistent performance, and clearer guidance for installation and troubleshooting, which can be invaluable if you ever encounter issues like dead sections.
Tips for Installing and Using LED Strip Lights Correctly
Proper installation and thoughtful use are paramount to the longevity and performance of your LED strip lights, significantly reducing the likelihood of developing dead sections.
Initial Installation Best Practices
- Plan Your Layout: Before cutting or adhering, lay out your strip to ensure it reaches all desired areas.
- Clean the Surface: Ensure the mounting surface is clean, dry, and smooth for optimal adhesive grip.
- Cut at Designated Marks: Only cut your LED strip at the clearly marked copper pads, usually indicated by a scissor icon. Cutting elsewhere will damage the circuit and create a dead section.
- Ensure Proper Power Supply: Always use a power supply that matches the voltage of your LED strip (e.g., 12V strip with a 12V adapter) and has sufficient wattage to power the entire length of your strip. Undersized power supplies can lead to dimming or complete failure in sections.
- Avoid Sharp Bends: LED strips are flexible but not invincible. Avoid bending them at angles sharper than 90 degrees, as this can damage the internal circuit lines and lead to dead LEDs.
- Secure Connections: Whether using solderless connectors or soldering, ensure all connections are firm and secure to prevent intermittent power or shorts.
|
Our Picks for the Best LED strip light in 2026
As an Amazon Associate I earn from qualifying purchases.
|
||
| Num | Product | Action |
|---|---|---|
| 1 | KSIPZE 100ft Led Strip Lights RGB Music Sync Color Changing Led Lights with Smart App Control Remote Led Lights for Bedroom Room Lighting Flexible Home Décor |

|
| 2 | White Led Strip Lights for Bedroom Small Dimmable LED Lights Strip 16.4ft Super Bright Flexible LED Tape Lights Rope Light for for Room Home Decor Luces Leds for Living Room Kitchen Vanity Mirror |
|
| 3 | Govee RGBIC LED Strip Lights, Smart LED Lights for Bedroom, Bluetooth LED Lights APP Control, DIY Multiple Colors on One Line, Color Changing LED Strip Lighting Music Sync, Home Decor, 16.4ft |
|
| 4 | Barrina (6 Pack LED T5 Integrated Single Fixture, 4FT, 2200lm, 6500K Super Bright White, 20W Utility LED Shop Light, Ceiling and Under Cabinet Light, Corded Electric with ON/Off Switch, ETL Listed |
|
| 5 | NBBUFF Led Lights for Bedroom 50ft (1 Roll), Color Changing RGB Led Strip Lights with 60 Keys Remote and App Control, Music Sync Led Lights for Room Kitchen Party Home Decor |
|
| 6 | DAYBETTER Led Strip Lights 32.8ft Kit with Remote and Power Supply Color Changing |
|
| 7 | DAYBETTER LED Strip Lights 110ft, Smart Lighting Strips with App Remote Control, RGB Music Sync Color Changing Lights for Bedroom Kitchen Party Home Decor Luces led para cuarto (1 Roll) |
|
| 8 | Govee 100ft RGBIC LED Strip Lights, Smart LED Lights Work with Alexa and Google Assistant, LED Lights for Bedroom WiFi App Control Segmented DIY Multiple Colors, Color Changing Light, (2 x 50ft) |
|
| 9 | Govee White LED Strip Lights, Upgraded 16.4ft Dimmable LED Light Strip 6500K Bright Daylight White, Strong Adhesive, 300 LEDs Flexible Tape Lights for Mirror, Kitchen Cabinet, Bedroom, Christmas Decor |
|
| 10 | dalattin White LED Strip Lights, 20ft Dimmable Super Bright 24V Led Tape Light 6500K 360 LEDs Lights for Bedrooms, Mirror, Kitchen, Home Decoration Daylight White |
|
Diagnosing and Fixing Dead Sections
If you encounter a dead section, don’t panic. Most issues can be traced back to a few common culprits.
Step 1: Initial Checks
- Check Power Supply and Connections: First, verify that your power adapter is securely plugged in and functioning correctly. A loose connection at the power supply or where the strip connects to the controller/dimmer is a frequent cause of partial or complete strip failure. Wiggle the connections gently to see if the lights flicker back on.
- Inspect for Visible Damage: Carefully examine the dead section of the strip. Look for any obvious signs of physical damage:
- Burnt-out LEDs: Individual black dots on the LED chips.
- Broken Circuit Lines: Small, hairline cracks or breaks in the copper traces on the strip itself, often caused by excessive bending or crushing.
- Water Damage: If used in a humid environment or outdoors, look for corrosion or water ingress, especially if the strip isn’t IP-rated for such conditions.
- Loose or Corroded Connectors: Check any connectors used to join strip segments or to attach the power source. Corroded contacts can prevent current flow. Clean them with rubbing alcohol and a cotton swab.
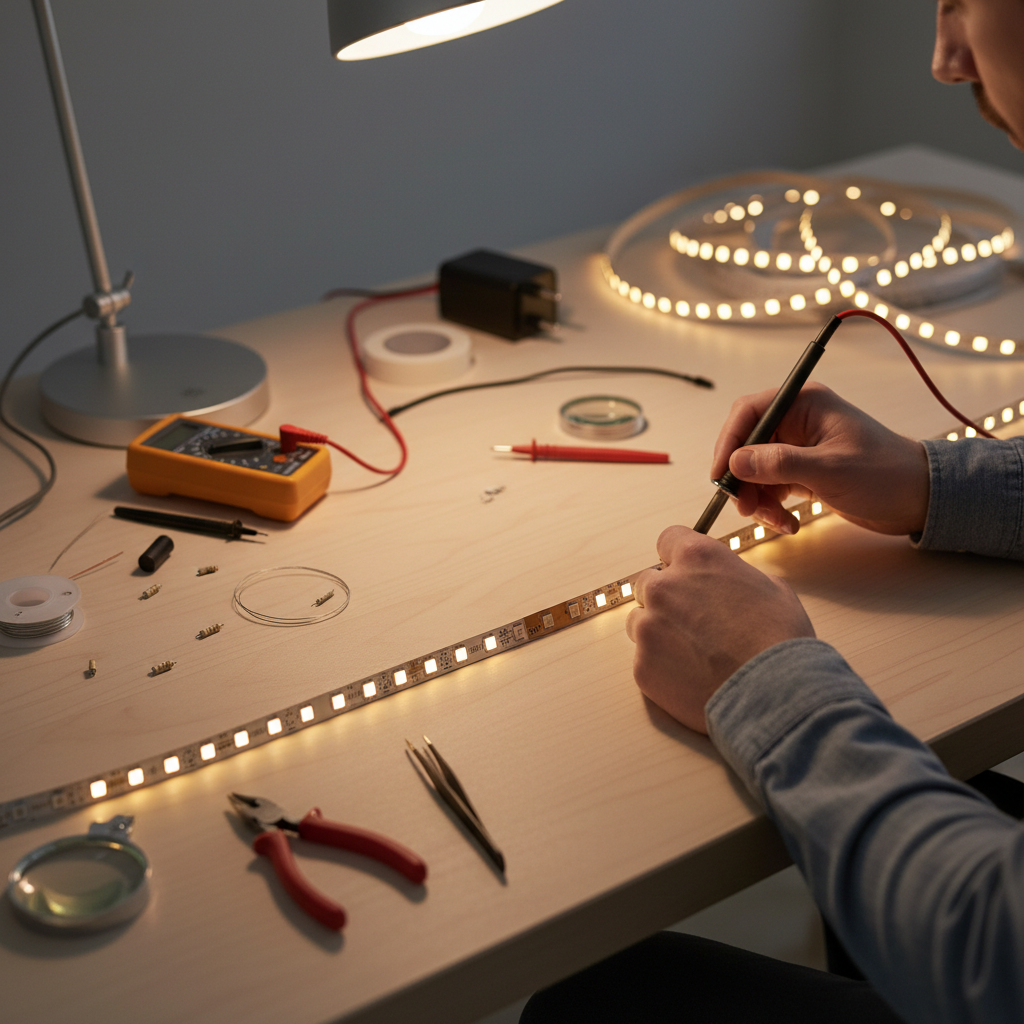
Step 2: Testing with a Multimeter (Recommended for Precision)
A multimeter is an invaluable tool for precise diagnosis.
- Test Voltage: With the power on, carefully use the multimeter to check the voltage at the input of the strip, then at the beginning of the dead section, and finally at the end of the dead section. A sudden drop or complete absence of voltage within the dead segment confirms an open circuit or break.
- Test for Continuity (Power Off): Disconnect the power. Set your multimeter to continuity mode. Touch the probes to the copper pads on either side of the dead section. If there’s no continuity (the multimeter doesn’t beep or show a reading), it confirms a break in the circuit within that segment.
Step 3: The Repair Process: Cutting and Reconnecting
Once you’ve identified the faulty segment, the most effective DIY fix is often to cut out the damaged portion and reconnect the working ends.
Option A: Using Solderless Connectors (DIY Friendly)
This is the easiest and most common method for home users, requiring no soldering skills.
- Locate Cut Points: Find the nearest designated cut points (marked by a scissor icon and copper pads) on either side of the dead section. Always cut within the non-working part.
- Cut the Damaged Section: Using sharp scissors or wire cutters, carefully cut the LED strip cleanly along the designated cut lines to remove the dead segment.
- Clean Connection Pads: Gently clean the copper connection pads on the ends of the healthy strips you intend to join using rubbing alcohol to ensure good electrical contact.
- Insert into Connector: Open your solderless connector (ensure it’s compatible with your strip’s width and number of pins – e.g., 2-pin for single color, 4-pin for RGB). Slide the end of one healthy strip into one side of the connector, ensuring the copper pads align with the connector’s pins. Close the clip or cover firmly. Repeat for the other healthy strip on the opposite side of the connector.
- Test: Reconnect the power and test your strip. If done correctly, the entire strip should now light up.
Option B: Soldering (For Advanced DIYers)
Soldering provides a more permanent and robust connection but requires a soldering iron and some skill.
- Prepare the Strips: As with solderless connectors, cut out the dead section. Gently scrape off the protective coating (if any) from the copper pads on the healthy strip ends.
- Tin the Pads: Apply a small amount of solder to the copper pads on the strip ends.
- Solder Wires/Jumper: If bridging a gap, use appropriately gauged wires. Tin the ends of the wires. Carefully solder the tinned wire ends to the corresponding tinned pads on the LED strip. For direct strip-to-strip soldering, carefully align the strips and solder the pads together.
- Insulate: After soldering, use heat shrink tubing or electrical tape to insulate the exposed connections, preventing short circuits.
- Test: Apply power to check your repair.
Preventing Future Issues
- Mind Voltage Drop: For long runs of LED strips, voltage drop can cause the end of the strip to be dimmer. Consider using a 24V strip, injecting power at multiple points, or using thicker gauge wires for extensions.
- Use Compatible Accessories: Ensure all components – power supply, controller, dimmer, connectors – are compatible with your specific LED strip light’s voltage and current requirements.
- Proper Heat Management: While LEDs generate less heat than traditional bulbs, they still produce some. Avoid installing strips in enclosed, unventilated spaces where heat can build up and shorten their lifespan.
- Regular Cleaning: Dust and debris can accumulate on strips, potentially affecting performance over time. Gently clean them with a dry cloth.
“Many dead sections in LED strips are due to simple breaks in the circuit or loose connections, not necessarily dead LEDs. A quick visual inspection and a solderless connector can often fix the issue in minutes, saving you the cost and hassle of replacing the entire strip.” – John Smith, Electrical Technician specializing in LED lighting
Conclusion
Encountering a dead section in your LED strip light can be annoying, but it’s far from a death sentence for your lighting setup. By systematically diagnosing the problem, often starting with power and connection checks, followed by a thorough visual inspection and, if necessary, testing with a multimeter, you can pinpoint the exact cause. The most common and DIY-friendly solution involves simply cutting out the faulty segment and reconnecting the healthy ends with a solderless connector. With these practical tips and a bit of patience, you can extend the life of your LED strips and keep your spaces beautifully illuminated. What repair challenges have you faced with your LED strip lights, and how did you overcome them?
Câu Hỏi Thường Gặp
How do I know if my LED strip light is fixable or needs replacement?
If only a segment or a few LEDs are dead, and the rest of the strip still works, it’s highly likely fixable by cutting out the faulty section and using a connector. If the entire strip is dead, first check the power supply and connections; if these are fine and there’s no visible damage, it might be an internal driver issue or extensive damage, suggesting replacement might be more practical.
Can I fix a dead section on an LED strip without soldering?
Yes, absolutely! Solderless connectors are specifically designed for this purpose. They allow you to cut out a damaged section and easily clip the healthy ends back together, creating a new, functioning circuit without the need for a soldering iron or advanced electrical skills. Ensure you choose the correct type of connector for your strip (e.g., 2-pin for single color, 4-pin for RGB).