LED strip lights have transformed modern lighting, offering incredible flexibility, vibrant colors, and energy efficiency for both decorative and functional applications. However, one often-overlooked yet crucial component for any successful LED strip setup is the connector. Incorrect or poorly installed connectors can lead to frustrating issues like flickering, partial lighting failures, or even damage to your LED strips. This comprehensive guide will walk you through everything you need to know about gapless LED strip connectors, ensuring you achieve seamless, reliable, and stunning lighting installations.
Understanding Gapless LED Strip Connectors
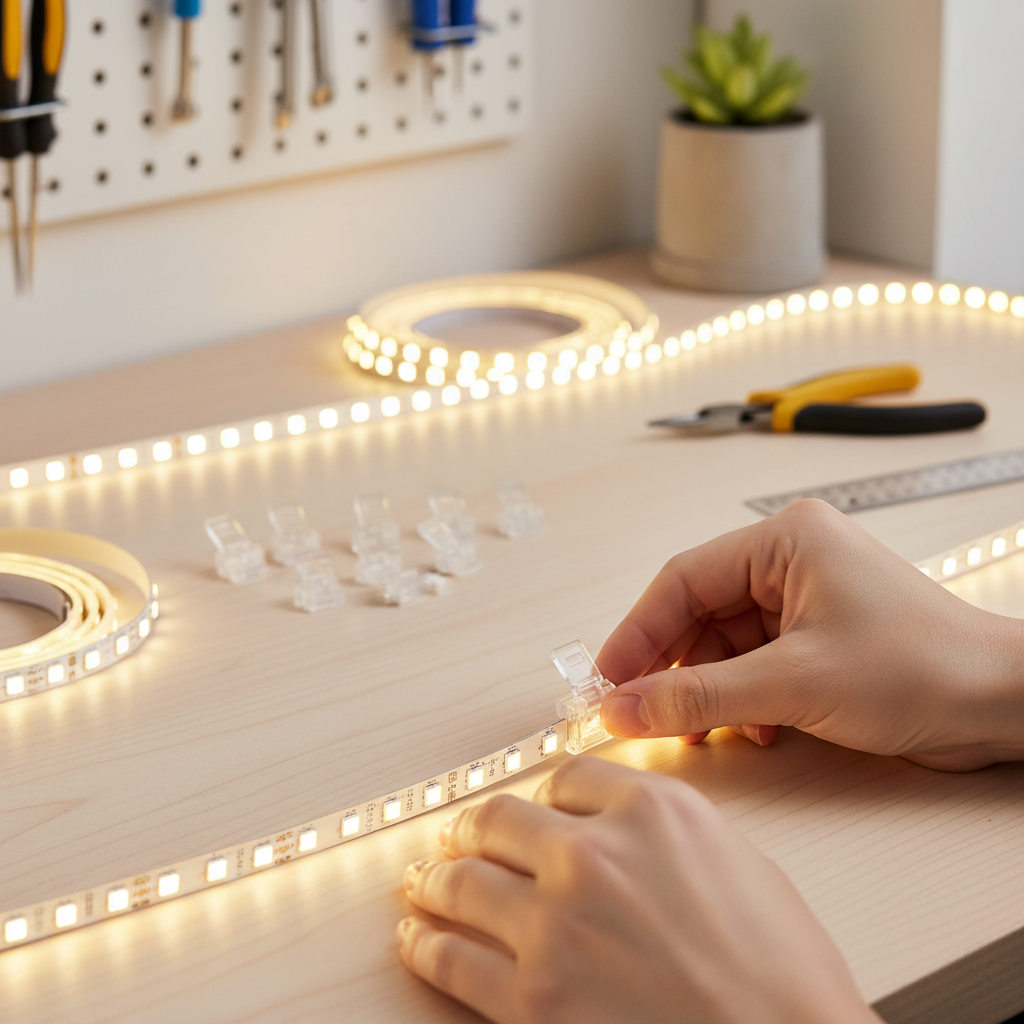
Gapless LED strip connectors are ingenious devices designed to join sections of LED strip lights together without the need for soldering. They create a continuous, uninterrupted flow of light, eliminating dark spots that can occur at connection points. These connectors typically consist of a small plastic housing with metal contacts or pins inside. When an LED strip is inserted, these contacts press firmly against the copper pads on the strip’s printed circuit board (PCB), establishing an electrical connection. The primary principle is a pressure-based, solderless contact, making installation quicker and more accessible for DIY enthusiasts and professionals alike.
The evolution of LED strip lighting has driven the need for simpler, more efficient connection methods. While soldering provides a robust, permanent bond, it requires specific tools and a certain level of skill. Gapless connectors emerged as a user-friendly alternative, allowing anyone to extend, turn corners, or branch their LED strip layouts with ease. Their versatility has made them indispensable in modern lighting design, from under-cabinet lighting to intricate architectural accents.
Gapless connectors come in various types, primarily categorized by the number of pins they accommodate (2-pin for single color, 3-pin for CCT/dual white, 4-pin for RGB, 5-pin for RGBW/RGBWW) and their functional shape. Common applications include creating extended runs, navigating 90-degree corners, making “T” or “X” branches, or connecting a strip directly to a power source or controller.
Key Advantages of Gapless LED Strip Connectors
LED strip lights themselves boast several inherent advantages over traditional lighting, and gapless connectors enhance these benefits by simplifying their integration into various projects.
- Energy Efficiency: LED strips are inherently energy-efficient, consuming significantly less power than incandescent or halogen bulbs. Proper connections ensure minimal energy loss, maintaining the strip’s high efficiency.
- Exceptional Longevity: With an average lifespan of 50,000 hours or more, LED strips are built to last. Using high-quality connectors helps preserve this longevity by preventing electrical inconsistencies that could shorten the strip’s operational life.
- Flexibility and Easy Installation: This is where gapless connectors truly shine. They allow for quick, tool-free (or minimal tool) installation, making it incredibly easy to cut strips to length, join them around corners, or extend them across vast spaces. Their design removes the barrier of soldering, opening up complex lighting designs to a wider audience.
- Diverse Color and Effect Options: LED strips offer a spectrum of colors and dynamic lighting effects, from warm whites to vibrant RGB hues. Gapless connectors maintain the integrity of these lighting features, ensuring consistent color and brightness across all joined segments.
- Enhanced Safety: Modern LED strips operate on low voltage (typically 12V or 24V DC), making them safer to handle than mains-voltage lighting. Gapless connectors, when properly installed, contribute to this safety by providing insulated, secure connections, minimizing the risk of short circuits or exposed wiring.
“Solderless connectors have revolutionized DIY LED strip installations, making sophisticated lighting designs accessible to everyone without compromising on aesthetics or functionality.”
Types of Gapless LED Strip Connectors: A Comparison Guide
Understanding the different types of gapless connectors is crucial for selecting the right one for your specific project needs. Each type serves a distinct purpose in creating a seamless and functional LED lighting system.
| Connector Type | Functionality | Pin Configuration | Typical Application | Key Feature |
|---|---|---|---|---|
| Strip-to-Strip (Straight) | Joins two LED strip segments end-to-end to extend length. | 2, 3, 4, 5-pin | Long linear runs, repairing cuts in a straight line. | Creates a seamless, uninterrupted light line. |
| L-Shaped (Corner) | Connects two LED strips at a 90-degree angle. | 2, 3, 4, 5-pin | Turning corners in cabinets, coves, or architectural details. | Maintains direction without bending the strip PCB. |
| T-Shaped (Branching) | Allows one LED strip to split into two separate directions. | 2, 3, 4, 5-pin | Creating branches in display cases or complex layouts. | Enables multi-directional lighting from a single point. |
| Strip-to-Wire | Connects an LED strip to a power supply, controller, or extension wire. | 2, 3, 4, 5-pin | Powering a strip, creating jumpers over obstacles. | Provides flexible wiring options. |
In addition to these common types, some specialized connectors exist, such as X-shaped for four-way branching or flexible jumper connectors with short wires to bridge small gaps or navigate slight curves. The choice depends entirely on your layout and the specific requirements of your LED strip (e.g., width, number of copper pads/channels).
Step-by-Step Guide: Properly Installing Gapless LED Strip Connectors
Installing gapless connectors is straightforward, but precision is key to ensuring a reliable and long-lasting connection.
1. Preparation: Tools, Materials, and Safety Checks
Before you begin, gather your tools and ensure a safe workspace.
- Tools You’ll Need: Scissors or a precision knife, small pliers (optional, for some connector types), a multimeter (for testing).
- Materials: Your LED strip lights, appropriate gapless connectors, power supply, and any necessary wiring.
- Safety Checks: Always disconnect the power supply from the mains before working on any electrical connections. Visually inspect your LED strips and wires for any damage or breaks. If installing in outdoor or humid environments, ensure you have waterproof connectors or sealants ready.
- Parameter Matching: Double-check that your chosen connectors are compatible with your LED strip’s voltage (e.g., 12V or 24V), width, and number of pins (e.g., 2-pin for single color, 4-pin for RGB). Also, verify the correct polarity (+ and – terminals) on both the strip and the connector.
|
Our Picks for the Best LED strip light in 2026
As an Amazon Associate I earn from qualifying purchases.
|
||
| Num | Product | Action |
|---|---|---|
| 1 | DAYBETTER LED Strip Lights 110ft, Smart Lighting Strips with App Remote Control, RGB Music Sync Color Changing Lights for Bedroom Kitchen Party Home Decor Luces led para cuarto (1 Roll) |

|
| 2 | Govee RGBIC LED Strip Lights, Smart LED Lights for Bedroom, Bluetooth LED Lights APP Control, DIY Multiple Colors on One Line, Color Changing LED Strip Lighting Music Sync, Home Decor, 16.4ft |
|
| 3 | dalattin White LED Strip Lights, 20ft Dimmable Super Bright 24V Led Tape Light 6500K 360 LEDs Lights for Bedrooms, Mirror, Kitchen, Home Decoration Daylight White |
|
| 4 | NBBUFF Led Lights for Bedroom 50ft (1 Roll), Color Changing RGB Led Strip Lights with 60 Keys Remote and App Control, Music Sync Led Lights for Room Kitchen Party Home Decor |
|
| 5 | DAYBETTER Led Strip Lights 32.8ft Kit with Remote and Power Supply Color Changing |
|
| 6 | White Led Strip Lights for Bedroom Small Dimmable LED Lights Strip 16.4ft Super Bright Flexible LED Tape Lights Rope Light for for Room Home Decor Luces Leds for Living Room Kitchen Vanity Mirror |
|
| 7 | KSIPZE 100ft Led Strip Lights RGB Music Sync Color Changing Led Lights with Smart App Control Remote Led Lights for Bedroom Room Lighting Flexible Home Décor |
|
| 8 | Govee 100ft RGBIC LED Strip Lights, Smart LED Lights Work with Alexa and Google Assistant, LED Lights for Bedroom WiFi App Control Segmented DIY Multiple Colors, Color Changing Light, (2 x 50ft) |
|
| 9 | Govee White LED Strip Lights, Upgraded 16.4ft Dimmable LED Light Strip 6500K Bright Daylight White, Strong Adhesive, 300 LEDs Flexible Tape Lights for Mirror, Kitchen Cabinet, Bedroom, Christmas Decor |
|
| 10 | Barrina (6 Pack LED T5 Integrated Single Fixture, 4FT, 2200lm, 6500K Super Bright White, 20W Utility LED Shop Light, Ceiling and Under Cabinet Light, Corded Electric with ON/Off Switch, ETL Listed |
|
2. Strip-to-Wire Connection
This method is used for attaching wires for power input or extensions.
- Cut the LED Strip: Using sharp scissors, cut the LED strip precisely along the designated cut line, usually marked with a copper pad icon. Ensure a clean, straight cut.
- Prepare the Strip: For waterproof strips, carefully trim any silicone coating or waterproof material from the copper pads at the cut end, exposing them completely. Be gentle to avoid damaging the pads.
- Open the Connector: Open the clip or latch on the gapless connector.
- Insert the LED Strip: Carefully slide the prepared end of the LED strip into the connector. Ensure the copper pads on the strip align perfectly with the metal contacts or pins inside the connector. Pay close attention to polarity, matching the ‘+’ on the strip with the ‘+’ on the connector, and similarly for other channels (R, G, B).
- Secure the Strip: Press down firmly on the clip or latch until it snaps shut. You should feel a distinct click, indicating a secure connection. For some types, light pliers might be needed for a tight seal.
- Insert the Wire: If it’s a strip-to-wire connector, strip about 5-8mm of insulation from the corresponding wires and insert them into the wire terminals of the connector. Close the terminal clips securely.
- Seal for Protection (Optional but Recommended): For long-term durability, especially in damp or exposed areas, apply heat shrink tubing over the connection or seal the joint with electrical tape or silicone sealant.
3. Strip-to-Strip Connection
This method is used to extend two LED strips directly.
- Prepare Both Strips: Cut both LED strips cleanly along their marked lines and, if waterproof, expose the copper pads as described above.
- Align Polarity: Crucially, ensure that the positive (+) and negative (-) terminals (and color channels for RGB/W strips) on both strips align correctly with each other and with the connector’s internal contacts.
- Insert Both Strips: Open both clips/latches on the connector. Slide one LED strip into one side of the connector and the second LED strip into the other side. Make sure both strips are fully inserted and their copper pads make firm contact with the connector’s pins.
- Lock the Clips: Close both clips or latches firmly until they snap into place, ensuring a tight, secure connection.
- Test and Protect: Briefly connect your power supply to check if both strips light up correctly and consistently. If satisfied, consider reinforcing the connection with electrical tape, heat shrink, or silicone, particularly for outdoor use.
Common Mistakes and How to Avoid Them for a Flawless Connection
Even with straightforward gapless connectors, common errors can lead to frustrating performance issues. Being aware of these pitfalls can save you time and effort.
- Reversed Polarity: Connecting the positive (+) and negative (-) terminals incorrectly is a frequent mistake, especially with single-color strips where only two pads are present. Always double-check the polarity markings on both your strip and connector before closing the clip.
- Improper Strip Preparation:
- Not cutting along the designated line: This can damage internal circuits or lead to an unstable connection.
- Shallow or deep stripping: For waterproof strips, not removing enough silicone can prevent proper contact, while stripping too much can expose delicate components. Expose just enough copper for the connector’s pins to bite.
- Loose Connections: The most common culprit for flickering or intermittent lighting. Ensure the connector’s clips are fully locked and the strip is seated firmly. Sometimes, a gentle squeeze with pliers can ensure a tighter grip, especially for bite-style connectors.
- Underrated Wire Gauge: Using wires that are too thin for the length or current draw of your LED strip can cause voltage drop, resulting in dimming towards the end of the strip, or even overheating of the wires. Always match the wire gauge to your strip’s specifications.
- Lack of Waterproofing Outdoors: Standard gapless connectors are often not waterproof. For outdoor or high-moisture applications, you must use IP-rated waterproof connectors or apply a robust silicone sealant around all connections to prevent moisture ingress.
- Skipping Testing Steps: Always perform a brief test of your connections with the power supply before making them permanent or fully mounting the strips. This allows you to identify and fix issues early.
Troubleshooting Guide: Fixing LED Strip Connection Problems
If your LED strip lights aren’t performing as expected, a systematic approach to troubleshooting can help pinpoint the problem.
- Direct Connect Test: If a section isn’t lighting up, disconnect it from the connectors and directly connect a small segment of the LED strip to a known working power supply. If it lights up, the strip itself is likely fine, and the issue lies in the connector or wiring.
- Section Test: If you have multiple connectors in a run, isolate each section and test them individually. This helps narrow down which specific connector or strip segment is faulty.
- Wiggle Test: Gently wiggle the wires and the connector itself while the power is on. If the lights flicker or come on intermittently, it indicates a loose connection within that connector or its associated wiring.
- Measure Voltage: Use a multimeter to check the voltage at different points: at the power supply output, before the first connector, and after each subsequent connector. Significant voltage drops can indicate a poor connection or an overloaded circuit.
- Inspect Seals: For outdoor or humid installations, meticulously inspect all sealed connections for any signs of moisture, corrosion, or damage to the sealant. Water ingress is a common cause of failure in such environments.
- Replace Faulty Connector: If, after these tests, you identify a specific connector as the problem, replace it. Sometimes, internal contacts can lose tension or corrode over time, even if they appear fine externally. Opt for a higher-quality replacement to ensure durability.
Choosing the Right Gapless Connector: Brands and Quality Factors
Selecting the right gapless connector goes beyond just picking the correct pin count and shape. Quality plays a significant role in the longevity and reliability of your LED lighting system.
When considering brands, look for those known for their reliability in LED accessories. While I cannot recommend specific brands directly, reputable manufacturers in the LED lighting industry often produce high-quality connectors. Researching user reviews and professional endorsements can provide valuable insights into a brand’s performance and customer satisfaction.
Several quality factors differentiate reliable connectors from subpar alternatives:
- Material Quality: High-quality connectors use pure copper contacts for optimal conductivity and minimal resistance, reducing the risk of overheating and voltage drop. Some cheaper connectors may use other metals that are less conductive, leading to problems.
- Clip Mechanism: A robust and well-designed clip or latch mechanism ensures a secure, tight grip on the LED strip, preventing loose connections over time. Avoid connectors that feel flimsy or don’t provide a confident “snap” when closed.
- Insulation and Housing: The outer housing should be made of durable, flame-retardant plastic that can withstand typical operating temperatures. For outdoor or wet applications, ensure the connector has an appropriate IP (Ingress Protection) rating, indicating its resistance to dust and water.
- Compatibility: Always verify that the connector’s width (e.g., 8mm, 10mm, 12mm) and pin configuration (2-pin, 3-pin, 4-pin, 5-pin) perfectly match your LED strip light. A mismatch will lead to poor contact or no connection at all.
- Certifications: Look for products that meet relevant quality and safety standards, such as CE, RoHS, or UL certifications. These indicate that the product has undergone testing and complies with specific regulatory requirements.
By prioritizing these quality factors, you invest in a more reliable and durable LED strip light installation, minimizing future maintenance and troubleshooting.
Conclusion
Mastering the proper use of gapless connectors is fundamental to achieving a successful and visually appealing LED strip light installation. These convenient tools simplify complex wiring, allowing you to extend runs, navigate corners, and create custom lighting layouts with ease. By understanding the different types of connectors, meticulously following installation steps, diligently avoiding common mistakes like reversed polarity or loose connections, and knowing how to troubleshoot, you can ensure your LED strip lighting system operates flawlessly for years to come. Remember, a reliable connection is the backbone of consistent illumination. Embrace the versatility of gapless connectors to bring your lighting visions to life, creating dynamic and captivating spaces in your home or commercial projects.
What innovative LED strip light projects are you planning to tackle with gapless connectors next?
Frequently Asked Questions
What are gapless LED connectors, and when should I use them?
Gapless LED connectors are solderless clips designed to join sections of LED strip lights together, creating a continuous flow of light without visible dark spots. You should use them when extending LED strips, making turns (L-shaped), branching off (T-shaped), or connecting a strip to a power source without soldering. They are ideal for DIY projects and installations requiring quick, flexible connections.
Can gapless connectors be used with waterproof LED strips?
Yes, but with a crucial caveat. For waterproof LED strips (typically IP65 or higher, often with a silicone coating), you must first carefully remove the protective silicone layer from the copper contact pads at the cut points before inserting them into the connector. Additionally, you should use IP-rated waterproof connectors or apply a silicone sealant around the connection point to maintain the strip’s waterproofing in the installation area.
How do I fix a flickering LED strip light if I’m using gapless connectors?
Flickering often indicates a poor or loose connection. First, check the power supply to ensure it’s adequate. Then, inspect each gapless connector: open the clip, re-insert the LED strip firmly, ensuring copper pads align perfectly with the connector’s pins, and snap the clip shut tightly. A gentle wiggle test can help confirm if a specific connector is loose. If the issue persists, replace the suspected faulty connector with a new, high-quality one.