LED strip lights have transformed modern illumination, offering unmatched flexibility and aesthetic appeal for various applications, from accent lighting to complete room illumination. Their versatility makes them a popular choice for both professional designers and DIY enthusiasts. A common challenge arises when planning larger installations: how to power multiple segments of LED strip lights efficiently and safely from a single power source. This comprehensive guide will walk you through the essential considerations, wiring methodologies, and step-by-step instructions to successfully connect multiple LED strip lights to one driver, ensuring a brilliant and lasting lighting setup.
Using a single power supply streamlines your setup, reduces cable clutter, and can be more cost-effective than employing individual adapters for each strip. Moreover, it centralizes control and simplifies future maintenance. By the end of this guide, you will be equipped with the knowledge to accurately calculate your power needs, select the right components, and execute a flawless LED strip installation.
Understanding LED Strip Lights and Drivers
At the heart of any LED strip light system is the LED driver, often simply referred to as the power supply. This crucial component converts your home’s alternating current (AC) electricity into the direct current (DC) voltage required by LED strips. Most LED strips operate on low-voltage DC, typically 12V or 24V. The driver’s role is to regulate this voltage and current, ensuring your LEDs receive the precise amount of power needed to operate correctly, preventing issues like flickering, dimming, or premature burnout.
Choosing the right driver with adequate capacity and voltage is paramount when planning to power multiple LED strips. It acts as the brain and heart of your lighting system, dictating its performance and longevity.
Essential Pre-Wiring Considerations
Before you begin connecting any wires, careful planning is crucial. Skipping these preliminary steps can lead to inconsistent brightness, system failures, or even safety hazards. Understanding these fundamentals ensures a successful and long-lasting LED lighting project.
Calculating Total Power Requirements
|
Our Picks for the Best LED strip light in 2026
As an Amazon Associate I earn from qualifying purchases.
|
||
| Num | Product | Action |
|---|---|---|
| 1 | KSIPZE 100ft Led Strip Lights RGB Music Sync Color Changing Led Lights with Smart App Control Remote Led Lights for Bedroom Room Lighting Flexible Home Décor |

|
| 2 | DAYBETTER Led Strip Lights 32.8ft Kit with Remote and Power Supply Color Changing |
|
| 3 | Govee 100ft RGBIC LED Strip Lights, Smart LED Lights Work with Alexa and Google Assistant, LED Lights for Bedroom WiFi App Control Segmented DIY Multiple Colors, Color Changing Light, (2 x 50ft) |
|
| 4 | White Led Strip Lights for Bedroom Small Dimmable LED Lights Strip 16.4ft Super Bright Flexible LED Tape Lights Rope Light for for Room Home Decor Luces Leds for Living Room Kitchen Vanity Mirror |
|
| 5 | Barrina (6 Pack LED T5 Integrated Single Fixture, 4FT, 2200lm, 6500K Super Bright White, 20W Utility LED Shop Light, Ceiling and Under Cabinet Light, Corded Electric with ON/Off Switch, ETL Listed |
|
| 6 | Govee White LED Strip Lights, Upgraded 16.4ft Dimmable LED Light Strip 6500K Bright Daylight White, Strong Adhesive, 300 LEDs Flexible Tape Lights for Mirror, Kitchen Cabinet, Bedroom, Christmas Decor |
|
| 7 | Govee RGBIC LED Strip Lights, Smart LED Lights for Bedroom, Bluetooth LED Lights APP Control, DIY Multiple Colors on One Line, Color Changing LED Strip Lighting Music Sync, Home Decor, 16.4ft |
|
| 8 | DAYBETTER LED Strip Lights 110ft, Smart Lighting Strips with App Remote Control, RGB Music Sync Color Changing Lights for Bedroom Kitchen Party Home Decor Luces led para cuarto (1 Roll) |
|
| 9 | dalattin White LED Strip Lights, 20ft Dimmable Super Bright 24V Led Tape Light 6500K 360 LEDs Lights for Bedrooms, Mirror, Kitchen, Home Decoration Daylight White |
|
| 10 | NBBUFF Led Lights for Bedroom 50ft (1 Roll), Color Changing RGB Led Strip Lights with 60 Keys Remote and App Control, Music Sync Led Lights for Room Kitchen Party Home Decor |
|
The most critical factor in connecting multiple LED strips to one driver is ensuring the driver can supply enough power for all connected strips. Each LED strip has a specific power consumption, typically measured in watts per meter (W/m). To determine your total power needs, multiply the wattage per meter by the total length of all your strips combined.
For example, if you have three 5-meter LED strips, each consuming 10W/m:
Total Power = (10 W/m 5 m/strip) 3 strips = 150 Watts.
It is highly recommended to select a driver with a slightly higher capacity than your calculated total power requirement, ideally 20-30% more. This “80% rule” prevents the driver from continuously running at its maximum capacity, which significantly extends its lifespan and improves overall system stability. So, for 150W of LED strips, a 180W to 200W driver would be a safer choice.
Voltage Matching: The Golden Rule
The most critical rule when connecting LED strip lights is to ensure that the voltage of your LED strips perfectly matches the output voltage of your power supply. Most LED strips operate on either 12V DC or 24V DC. Connecting a 12V strip to a 24V power supply will likely burn out the LEDs almost instantly, while connecting a 24V strip to a 12V power supply will result in very dim or non-functional lights. Always double-check the voltage ratings on both your LED strips and your driver before making any connections.
Wire Gauge and Voltage Drop
Voltage drop occurs when the electrical resistance in a wire causes a decrease in voltage over distance, leading to dimmer lights further along the strip or circuit. When wiring multiple LED strips, especially over longer distances, selecting the correct wire gauge is essential. Thicker wires have lower resistance and are better at minimizing voltage drop. Consult a wire gauge chart to choose an appropriate thickness based on the total current and the distance between your driver and the furthest LED strip. Using insufficient wire gauge can lead to uneven brightness and decreased efficiency.
Parallel vs. Series Wiring: The Recommended Approach
When connecting multiple LED strip lights to a single driver, the wiring method is crucial for optimal performance, consistent brightness, and system longevity. You typically have two primary options: parallel wiring or series wiring.
Parallel Wiring (Recommended for LED Strips)
In a parallel circuit, each LED strip is connected directly to the driver’s output terminals. This means the positive (+) terminal of each LED strip connects to the positive output of the power supply, and the negative (-) terminal of each strip connects to the negative output.
Advantages of Parallel Wiring:
- Consistent Brightness: Each strip receives the full voltage from the power supply, ensuring uniform brightness across all connected segments.
- Even Voltage Distribution: Minimizes voltage drop issues, especially crucial for longer runs of LED strips.
- Redundancy: If one LED strip fails, it does not affect the performance of the other strips in the circuit.
- Easy Maintenance: Individual strips can be easily added, removed, or replaced without disrupting the entire system.
- Standard Practice: It is the standard and recommended practice for constant voltage LED strip installations.
Series Wiring (Not Recommended for LED Strips)
In a series circuit, LED strips are connected end-to-end, forming a single continuous path for the electrical current. The positive end of one strip connects to the negative end of the next, and so on.
Disadvantages of Series Wiring:
- Voltage Drop: The electrical current flows sequentially through each LED. This causes a cumulative voltage drop, meaning strips further down the line will receive less voltage and appear significantly dimmer.
- Uneven Brightness: The most noticeable effect is a clear drop in brightness along the length of the combined strips.
- Single Point of Failure: If any single LED or strip in the series fails, the entire circuit breaks, and all connected strips will go dark, similar to old Christmas lights.
- Potential Overload: The total voltage across strips can add up, potentially exceeding the driver’s capacity or the maximum voltage rating of individual strips, leading to damage.
“For optimal performance and longevity in LED strip light installations, parallel wiring is almost always the superior choice. It ensures consistent brightness and reduces the risk of voltage-related issues common with series connections.”
Bảng So Sánh Các Loại Đèn LED Strip Light Phổ Biến
While the focus here is on wiring, understanding common LED strip types helps inform decisions about power and installation. This table provides a general comparison, keeping in mind that specific specifications vary by manufacturer.
| Loại đèn | Điện áp | Màu sắc | Công suất (W/m) | Độ sáng (lm/m) | Tính năng nổi bật | Giá tham khảo (USD/m) |
|---|---|---|---|---|---|---|
| Single Color (e.g., Cool White) | 12V / 24V | Trắng (ấm/lạnh), Đỏ, Xanh, Lá | 4.8W – 14.4W | 300 – 1200 | Đơn giản, hiệu quả năng lượng | $1.50 – $5.00 |
| RGB | 12V / 24V | Đa màu (pha trộn) | 7.2W – 14.4W | 400 – 900 | Thay đổi màu sắc, điều khiển từ xa | $2.00 – $7.00 |
| RGBW | 12V / 24V | Đa màu + Trắng chuyên dụng | 9.6W – 19.2W | 600 – 1500 | Màu sắc phong phú, trắng tinh khiết | $3.00 – $10.00 |
| CCT Tunable White | 12V / 24V | Trắng (ấm đến lạnh, điều chỉnh) | 7.2W – 14.4W | 500 – 1100 | Điều chỉnh nhiệt độ màu trắng | $2.50 – $8.00 |
| COB LED Strip | 12V / 24V | Trắng (ấm/lạnh), RGB | 8W – 15W | 600 – 1300 | Ánh sáng đồng đều, không điểm nóng | $4.00 – $12.00 |
Note: Prices are approximate and can vary widely based on brand, quality, LED density, and features.
Step-by-Step Guide: Wiring Multiple LED Strips to One Driver (Parallel Method)
This section details the recommended parallel wiring method to ensure consistent and reliable illumination from your LED strips.
Step 1: Gather Your Tools and Materials
Before starting, ensure you have the following:
- LED Strips: Your desired lengths and type.
- LED Driver (Power Supply): Rated for the correct voltage and sufficient wattage (remember the 80% rule).
- Wire Strippers: For safely preparing wires.
- Electrical Wires: Appropriate gauge for your current and distance.
- Connection Method:
- DC Splitter Cables: Simple plug-and-play for 2-4 strips.
- Terminal Blocks (or Power Distribution Blocks): Ideal for more strips, creating neat and secure connections.
- Solderless Connectors: Quick and easy for connecting strip to wire or strip to strip (if using short jumpers).
- Soldering Iron and Solder (Optional but Recommended): For the most secure and reliable connections.
- Heat Shrink Tubing or Electrical Tape: For insulating connections.
- Multimeter: To test voltage and continuity.
- Scissors: To cut LED strips at designated cut points.
Step 2: Calculate Your Power Needs and Select the Right Driver
As discussed, sum the total wattage of all your LED strips. Choose a driver whose output wattage is at least 20-30% higher than this total. Confirm the driver’s output voltage matches your LED strips’ voltage.
Step 3: Ensure Voltage Compatibility
Double-check that all your LED strips and the selected driver are rated for the same voltage (e.g., all 12V or all 24V). This is a non-negotiable step for safety and functionality.
Step 4: Prepare Your LED Strips
If you need to cut your LED strips to specific lengths, always cut only at the designated cut lines, usually marked with a scissor icon or copper pads. Carefully strip about 0.5 cm (1/4 inch) of insulation from the ends of the wires connected to your LED strips, exposing the copper conductors. If your strips have bare copper pads, you’ll need to use solderless connectors or solder wires directly to them.
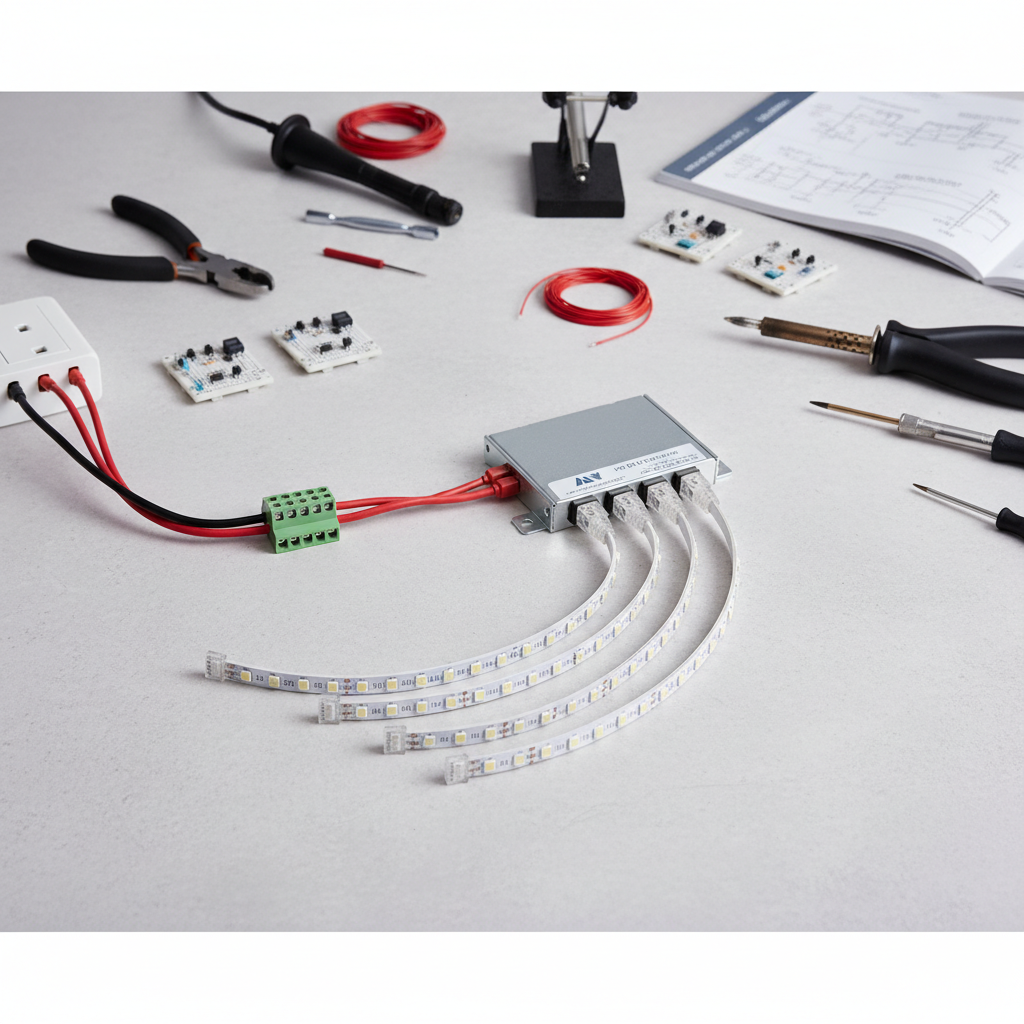
Step 5: Make the Parallel Connections
This is where the magic happens. You’ll connect the positive wire from each LED strip to the positive output of your driver, and the negative wire from each LED strip to the negative output of your driver.
- Using DC Splitter Cables: If you have 2-4 strips and your driver has a compatible DC jack, a simple splitter cable can make this connection easy. Plug the driver into the splitter’s input, then plug each LED strip’s connector into an output.
- Using a Terminal Block: This is often the most robust and organized method for multiple strips.
- Connect the driver’s positive output wire to one of the positive terminals on the block.
- Connect the positive wire from each LED strip to a separate positive terminal on the block.
- Repeat this process for the negative wires: driver’s negative output to a negative terminal, and each LED strip’s negative wire to separate negative terminals.
- Ensure all connections are tight and secure.
Step 6: Minimize Voltage Drop (Advanced)
For very long runs or systems where strips are far from the driver, even parallel wiring can experience some voltage drop. To combat this:
- Use Thicker Wires: As mentioned earlier, heavier gauge wires reduce resistance.
- Multiple Power Injection Points: For extremely long individual runs, consider injecting power to both ends of a single LED strip or at intervals along its length from the main power distribution point. This ensures uniform brightness throughout.
Step 7: Test the Installation
Before finalizing your installation, plug in the driver and test your setup.
- Do all strips light up?
- Is the brightness consistent across all strips?
- Are there any flickers or dim spots?
If you observe any issues, immediately disconnect power and re-check your wiring, voltage compatibility, and power calculations.
Step 8: Secure and Insulate Connections
Once you’ve confirmed everything is working correctly, it’s vital to secure and insulate all exposed wire connections using heat shrink tubing or high-quality electrical tape. This prevents short circuits, protects against environmental factors, and ensures safety.
Tips for a Flawless and Safe Installation
Achieving a professional-looking and reliable LED strip light installation requires attention to detail and adherence to safety guidelines.
- Adhere to the 80% Rule: Never load your LED driver beyond 80% of its rated capacity. This buffer is crucial for safety, prevents overheating, and significantly extends the life of your power supply.
- Addressing Voltage Drop: For very long runs or installations where the driver is far from the strips, voltage drop is a critical concern. Parallel wiring is the first defense. Beyond that, consider using a higher voltage system (e.g., 24V instead of 12V for the same length) or implementing multiple power injection points for optimal and uniform brightness.
- Importance of Quality Components: Investing in high-quality LED strips, drivers, and connectors from reputable brands can prevent many common issues and ensure the longevity of your lighting system. Low-quality components are often made with inferior materials, leading to operational problems and safety hazards.
- Test Before Finalizing: Always test your entire setup before mounting strips permanently or concealing wires. This allows you to identify and rectify problems easily.
- Proper Insulation is Key: Exposed wires are a hazard. Always insulate all connections securely to prevent short circuits and ensure user safety.
Common Issues and Troubleshooting
Even with careful planning, you might encounter issues. Here are some common problems and their solutions:
Uneven Brightness or Dimming at One End
- Cause: Most likely voltage drop. This is a common issue with series wiring or long parallel runs using inadequate wire gauge.
- Solution: Ensure all strips are wired in parallel. Use thicker gauge wires. If the problem persists on a single long strip, consider power injection at multiple points along its length.
Strips Not Lighting Up
- Cause: No power, voltage mismatch, faulty connection, or overloaded driver.
- Solution: Check if the driver is plugged in and receiving power. Verify the driver’s output voltage matches the strips. Inspect all connections for looseness or incorrect polarity (+/-). Recalculate total wattage to ensure the driver is not overloaded.
Flickering Lights
- Cause: Loose connections, insufficient power from the driver, or a faulty driver.
- Solution: Secure all connections. Check power calculations to ensure the driver has enough capacity. If flickering continues, try a different driver to rule out a faulty unit.
Conclusion
Wiring multiple LED strip lights to a single driver can transform your space with cohesive and dynamic illumination. By carefully calculating your power requirements, ensuring voltage compatibility, and strictly adhering to parallel wiring principles, you can create a safe, efficient, and visually stunning lighting system. Remember the 80% rule for your driver’s capacity and always prioritize secure, insulated connections. With the right planning and execution, your LED strip light project will shine brightly for years to come.
Are you ready to illuminate your world with the perfect LED strip light setup? What creative lighting projects are you planning to bring to life?
Câu Hỏi Thường Gặp
How many LED strips can I connect to one driver?
The number of LED strips you can connect depends entirely on the total wattage of your strips and the power output of your driver. First, calculate the combined wattage of all your strips. Then, select a driver with at least 20-30% more capacity than this total wattage to ensure longevity and prevent overloading. For example, if your strips sum to 100W, use a driver rated for 120W or more.
What is voltage drop and how can I prevent it?
Voltage drop is the reduction in voltage as electricity travels along a wire, leading to dimmer lights further from the power source. It’s prevented by using parallel wiring, selecting appropriate (thicker) wire gauges for longer distances, and, in some cases, implementing multiple power injection points to ensure consistent voltage delivery across all strips.
Can I connect 12V and 24V LED strips to the same driver?
No, you cannot. All LED strips connected to a single driver must operate at the same voltage as the driver’s output. Connecting a 12V strip to a 24V driver will burn out the strip, and connecting a 24V strip to a 12V driver will result in very dim or non-functional lights.