Stepping into the world of LED strip lighting can feel like navigating a maze of technical specifications. From color temperature to wattage, every detail plays a crucial role in achieving your desired illumination. Among the most significant factors is LED density – specifically, the comparison between 60 LEDs per meter and 120 LEDs per meter. As an experienced technician with a decade in LED lighting, I’ve seen countless installations where the right density made all the difference. This guide will help you understand these options, ensuring your next lighting project shines perfectly.
LED Strip Lights: An Overview and Their Evolution
LED strip lights are versatile lighting solutions consisting of numerous light-emitting diodes mounted on a flexible circuit board. Backed with self-adhesive tape, these strips can conform to various surfaces, offering unparalleled design flexibility. Their compact nature and efficiency have made them a staple in both residential and commercial spaces.
Initially, LED strips were primarily used for accent lighting, providing subtle glows or decorative effects. Over time, advancements in LED technology have transformed them into powerful, primary lighting sources. We’ve seen an evolution from simple single-color strips to complex RGB/RGBW options with sophisticated controllers, allowing for dynamic color changes and dimming capabilities. The core principle remains: small, efficient diodes working together to create light.
Common LED strip types are often categorized by their color (single color, tunable white, RGB, RGBW), voltage (12V, 24V), and, critically, their LED density. This density dictates the number of individual LED chips packed into each meter of the strip, directly influencing the light’s appearance and intensity. From architectural accents to vibrant retail displays, LED strips continue to redefine modern lighting possibilities.
The Superior Advantages of LED Strip Lights
LED strip lights offer a compelling array of benefits that traditional lighting sources simply cannot match. Their popularity stems from a combination of efficiency, adaptability, and aesthetic versatility that makes them ideal for almost any lighting application.
Firstly, energy efficiency is a hallmark of LED technology. Compared to incandescent bulbs, which convert most energy into heat, LED strips consume significantly less power to produce equivalent or superior light output. This translates directly into lower electricity bills and a reduced carbon footprint, making them an environmentally conscious choice.
Durability and longevity are another major advantage. LED strip lights boast an impressive lifespan, often rated for 50,000 hours or more. This means years of maintenance-free operation, far outlasting traditional bulbs and reducing the hassle and cost of frequent replacements. Proper installation and thermal management can further extend their operational life.
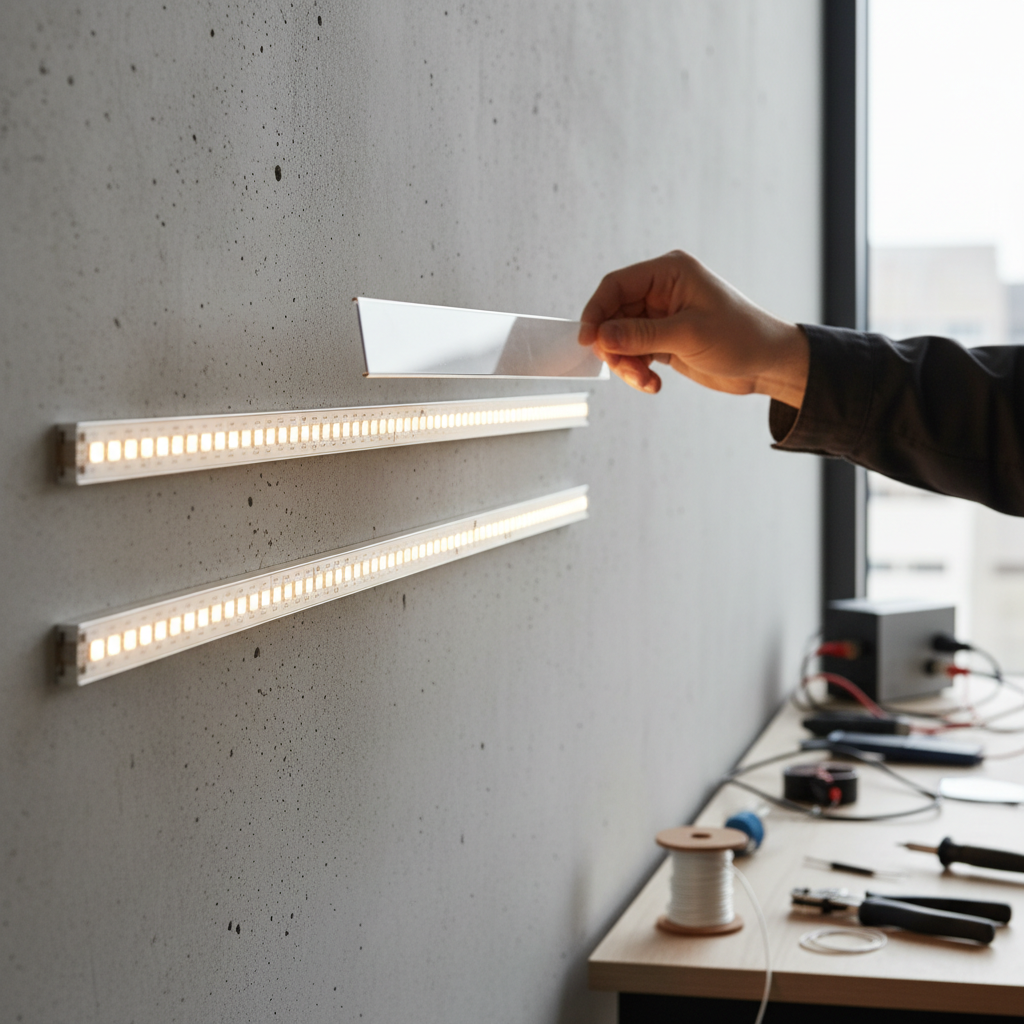
Their inherent flexibility and ease of installation are game-changers for both DIY enthusiasts and professional installers. The strips can be cut to specific lengths, bent around corners, and adhered to almost any clean, dry surface, allowing for creative lighting designs that are difficult to achieve with rigid fixtures. This adaptability makes them perfect for cove lighting, under-cabinet illumination, accentuating architectural features, and more.
Beyond practicality, LED strip lights excel in aesthetic flexibility. They are available in a vast spectrum of colors, including various shades of white, and dynamic RGB or tunable white options that allow for on-the-fly color changes. This enables users to create personalized ambiances, set moods, or highlight specific elements with vibrant, dynamic lighting effects.
Finally, LED strips are generally safer to use. They operate at low voltages, reducing electrical hazards, and emit very little heat, minimizing burn risks and making them suitable for installation in confined spaces or near heat-sensitive materials. They also do not contain harmful elements like mercury, unlike some fluorescent lights.
High-Density LED Strips: 60 vs 120 LEDs Per Meter
When selecting an LED strip, the density of LEDs per meter is a critical specification that profoundly impacts both the aesthetic and functional outcome of your lighting project. The choice between 60 LEDs per meter (often considered standard density) and 120 LEDs per meter (a common high-density option) depends heavily on your specific needs and the desired lighting effect.
| Feature | 60 LEDs/Meter | 120 LEDs/Meter |
|---|---|---|
| Brightness Output | Moderate (approx. 500-600 lumens/meter) | High (approx. 1000-1200 lumens/meter) |
| Light Uniformity | May show “hotspots” or visible dots, especially without diffusion | Provides a smoother, more continuous line of light |
| Power Consumption | Lower | Higher (approx. double compared to 60 LEDs/m) |
| Heat Generation | Lower | Higher, often requiring thermal management |
| Cost | More affordable | Higher initial cost |
| Ideal Applications | Ambient lighting, hidden installations, accent lighting, budget-sensitive projects | Task lighting, direct-view applications, luxury projects, reflective surfaces, architectural features, commercial displays |
| Visual Appearance | Dotted light effect possible | Seamless, professional lighting |
| Thermal Management | Less critical, but always beneficial | Often requires aluminum channels for heat dissipation |
For many general applications, 60 LEDs/meter strips offer a good balance of brightness and energy efficiency. They are often sufficient for creating ambient lighting effects in rooms where the strip itself is not directly visible, such as in ceiling coves or behind furniture. However, due to the wider spacing between individual LEDs, they can produce noticeable “hotspots” or a dotted appearance, especially if installed in shallow channels or on reflective surfaces. This can detract from a professional or high-end look.
In contrast, 120 LEDs/meter strips dramatically reduce the space between individual diodes. This closer spacing results in a significantly smoother and more uniform light output, effectively minimizing or eliminating visible hotspots. This makes them the preferred choice for applications where the LED strip is directly visible, such as under-cabinet lighting in kitchens, backlighting for mirrors, or in luxury retail displays. The higher density provides a more continuous bar of light, reflecting a higher quality finish.
“Choosing the right LED density isn’t just about brightness; it’s about the character of the light. A 120 LEDs/meter strip transforms a dotted line into a flawless glow, crucial for premium aesthetics.” – Expert Technician, reviewrinv.com
While 120 LEDs/meter strips offer superior light uniformity and often higher brightness, they also come with a higher power consumption and generate more heat. This necessitates proper thermal management, often requiring the use of aluminum profiles or channels, to ensure optimal performance and longevity.
Navigating the Selection: Your Guide to Choosing the Right LED Strip Light
Selecting the ideal LED strip light for your project involves more than just picking a color. It’s about aligning the technical specifications with your specific needs to achieve the perfect lighting solution. Here’s a detailed guide to help you make an informed decision.
1. Define Your Lighting Needs and Application:
Begin by clarifying the primary purpose of your LED strip. Are you aiming for ambient lighting in a living room, focused task lighting in a kitchen, or dynamic accent lighting for a retail display?
- Purpose: For task lighting (e.g., under kitchen cabinets, workbench), higher brightness and uniformity are crucial, making 120 LEDs/meter or more a strong contender. For ambient or mood lighting, 60 LEDs/meter might suffice, especially if diffused.
- Location: Consider whether the strip will be directly visible. If it’s exposed or mounted on reflective surfaces (like polished countertops), a higher density (120 LEDs/meter) is recommended to avoid noticeable hotspots. For hidden installations (e.g., inside coves, behind moldings), a 60 LEDs/meter strip can still deliver excellent results.
- Space: Larger areas requiring significant illumination might benefit from the increased lumen output of denser strips, while smaller decorative accents might not need as much power.
2. Choose the Right Density, Voltage, and Color:
Based on your needs, fine-tune these key specifications:
- LED Density: As discussed, 60 LEDs/meter is versatile for general ambient use, especially with diffusers. 120 LEDs/meter offers superior light uniformity, essential for a seamless, dot-free appearance in visible or high-end applications.
- Voltage: Most LED strips come in 12V or 24V. 24V strips are generally more efficient for longer runs, as they experience less voltage drop, resulting in more consistent brightness along the entire length. For shorter runs, 12V is often adequate.
- Color: Decide between single-color (warm white, cool white, natural white), tunable white (adjustable white temperature), or RGB/RGBW/RGBWW for color-changing capabilities. Match the color temperature to the room’s aesthetic and function.
3. Prioritize Product Quality and Reliability:
Don’t compromise on quality, as it impacts performance, lifespan, and safety.
- Reputable Brands: Opt for established brands known for their quality control and customer support. They often provide detailed specifications and certifications.
- Certifications: Look for certifications like UL, CE, RoHS, which indicate adherence to safety and environmental standards.
- User Reviews: Read customer reviews and ratings to gauge real-world performance and reliability. Pay attention to comments regarding brightness, color accuracy, longevity, and ease of installation.
4. Compare Pricing and Value:
While cost is a factor, focus on overall value rather than just the lowest price.
- Suppliers: Research various reputable suppliers and compare prices. Be wary of excessively cheap options, as they often indicate lower quality components.
- Promotions: Look out for promotions or bundle deals, especially if you need a larger quantity.
- Warranty: Check the warranty policy. A longer warranty period often signifies the manufacturer’s confidence in their product’s durability.
5. Consider Online Shopping Carefully:
Purchasing online offers convenience but requires diligence.
- Detailed Product Information: Ensure the product listing provides comprehensive specifications, including lumens per meter, wattage, CRI (Color Rendering Index), and cut points.
- Return Policy: Familiarize yourself with the seller’s return and exchange policies, especially for electronic components.
- Customer Support: Verify that the vendor offers accessible customer support in case you have questions or encounter issues.
By systematically evaluating these factors, you can confidently select LED strip lights that not only meet your functional requirements but also enhance the aesthetic appeal of your space.
Leading LED Strip Light Brands in the Market
The LED strip light market is robust, with several brands consistently delivering quality, innovation, and reliability. When considering your purchase, exploring offerings from these reputable manufacturers can ensure a satisfactory experience.
One of the most widely recognized names is Philips Hue, known for its smart lighting ecosystem. While their strips might be on the higher end price-wise, they offer exceptional color accuracy, seamless smart home integration, and robust app control. Philips Hue strips are ideal for users prioritizing advanced features, ease of use, and a cohesive smart lighting experience, though density options may vary depending on the product line.
Govee has gained significant popularity for its innovative and feature-rich LED strip lights, particularly those with dynamic RGBIC technology (independent chip control). Govee strips are often praised for their vibrant colors, extensive light effects, and user-friendly app, appealing to those who want creative and customizable lighting without breaking the bank. They offer various densities, often including high-density options for smoother light.
For professional-grade and architectural applications, brands like LED strip light and Waveform Lighting are highly regarded. These companies often focus on high CRI (Color Rendering Index) strips, ensuring accurate color reproduction, and provide various density options, including 120 LEDs/meter and higher, suitable for demanding projects where light quality and uniformity are paramount. Their products are typically built for longevity and consistent performance, often with robust thermal management solutions.
HitLights is another strong contender, offering a wide range of LED strip lights for both commercial and residential applications. They provide various densities, including 60 and 120 LEDs/meter, and emphasize ease of installation and comprehensive customer support. HitLights often caters to both DIYers and professionals looking for reliable and customizable lighting solutions.
For those seeking cost-effective yet decent quality options, brands found on platforms like AliExpress (e.g., certain reputable sellers or brands specializing in LED components like WS2812B strips) can be explored, though careful vetting of sellers and product reviews is crucial. These might offer a good entry point for specific project types, but quality consistency can vary.
Each brand offers unique strengths, from smart home integration to professional-grade performance and budget-friendly options. Your choice will depend on the specific demands of your project, your budget, and the features you value most in an LED strip light.
Mastering Installation and Maintenance for Your LED Strip Lights
Proper installation and ongoing maintenance are crucial for maximizing the performance, lifespan, and safety of your LED strip lights. A thoughtful approach ensures your lighting solution functions beautifully for years to come.
Detailed Installation Steps:
|
Our Picks for the Best LED strip light in 2026
As an Amazon Associate I earn from qualifying purchases.
|
||
| Num | Product | Action |
|---|---|---|
| 1 | Govee 100ft RGBIC LED Strip Lights, Smart LED Lights Work with Alexa and Google Assistant, LED Lights for Bedroom WiFi App Control Segmented DIY Multiple Colors, Color Changing Light, (2 x 50ft) |

|
| 2 | DAYBETTER Led Strip Lights 32.8ft Kit with Remote and Power Supply Color Changing |
|
| 3 | White Led Strip Lights for Bedroom Small Dimmable LED Lights Strip 16.4ft Super Bright Flexible LED Tape Lights Rope Light for for Room Home Decor Luces Leds for Living Room Kitchen Vanity Mirror |
|
| 4 | NBBUFF Led Lights for Bedroom 50ft (1 Roll), Color Changing RGB Led Strip Lights with 60 Keys Remote and App Control, Music Sync Led Lights for Room Kitchen Party Home Decor |
|
| 5 | KSIPZE 100ft Led Strip Lights RGB Music Sync Color Changing Led Lights with Smart App Control Remote Led Lights for Bedroom Room Lighting Flexible Home Décor |
|
| 6 | Govee White LED Strip Lights, Upgraded 16.4ft Dimmable LED Light Strip 6500K Bright Daylight White, Strong Adhesive, 300 LEDs Flexible Tape Lights for Mirror, Kitchen Cabinet, Bedroom, Christmas Decor |
|
| 7 | Govee RGBIC LED Strip Lights, Smart LED Lights for Bedroom, Bluetooth LED Lights APP Control, DIY Multiple Colors on One Line, Color Changing LED Strip Lighting Music Sync, Home Decor, 16.4ft |
|
| 8 | DAYBETTER LED Strip Lights 110ft, Smart Lighting Strips with App Remote Control, RGB Music Sync Color Changing Lights for Bedroom Kitchen Party Home Decor Luces led para cuarto (1 Roll) |
|
| 9 | dalattin White LED Strip Lights, 20ft Dimmable Super Bright 24V Led Tape Light 6500K 360 LEDs Lights for Bedrooms, Mirror, Kitchen, Home Decoration Daylight White |
|
| 10 | Barrina (6 Pack LED T5 Integrated Single Fixture, 4FT, 2200lm, 6500K Super Bright White, 20W Utility LED Shop Light, Ceiling and Under Cabinet Light, Corded Electric with ON/Off Switch, ETL Listed |
|
- Plan and Measure: Before cutting, measure your installation area precisely. Map out where the strip will run, noting any corners or obstructions. Ensure your chosen strip length matches your plan, considering the strip’s designated cut points (usually marked every few inches or centimeters).
- Gather Tools and Materials: You’ll typically need your LED strip, a compatible power supply (transformer/driver), an LED controller (if using RGB or dimmable strips), connectors, mounting clips (optional but recommended for long-term security), cleaning alcohol, and possibly aluminum channels or diffusers.
- Clean the Surface: The adhesive on the back of the LED strip works best on a clean, dry, and smooth surface. Wipe down the installation area thoroughly with isopropyl alcohol to remove any dust, grease, or moisture. Allow it to dry completely.
- Test Before Permanent Installation: Connect a small section of your LED strip to the power supply and controller to ensure it functions correctly. This step is vital to avoid having to re-install a faulty strip.
- Peel and Stick: Carefully peel off a small section of the adhesive backing from the strip. Start at one end and firmly press the strip onto the prepared surface, slowly peeling more of the backing as you go. Apply even pressure along the entire length to ensure good adhesion. Avoid stretching the strip during this process.
- Handle Corners and Curves: For gentle curves, the flexibility of the strip allows it to bend. For sharp 90-degree corners, it’s best to cut the strip at a designated cut point and use L-shaped connectors or solder jumper wires to maintain electrical continuity and prevent damage to the strip.
- Connect to Power Supply and Controller: Wire the LED strip to the appropriate output terminals of your controller (if applicable) and then connect the controller to the power supply. Ensure all connections are secure and polarity (positive to positive, negative to negative) is correct.
- Secure with Clips (Optional but Recommended): For long-term stability, especially on ceilings or under cabinets where gravity might pull at the adhesive, use mounting clips at regular intervals.
- Conceal Wiring: Neatly tuck away any visible wires. Cable ties, wire channels, or conduit can help achieve a clean, professional look.
Electrical Safety Considerations:
- Correct Voltage: Always use a power supply that matches the voltage requirements of your LED strip (e.g., 12V strip with a 12V power supply).
- Adequate Wattage: Ensure your power supply has sufficient wattage capacity to power the entire length of your LED strip. It’s recommended to choose a power supply with at least 10-20% more wattage than the total required by your strips to prevent overloading.
- Professional Help: If you’re unsure about wiring or dealing with mains electricity, always consult a qualified electrician.
- Thermal Management for High-Density Strips: For 120 LEDs/meter strips, which generate more heat, installing them in aluminum channels is highly recommended. These channels act as heatsinks, dissipating heat away from the LEDs and significantly prolonging their lifespan.
Usage and Maintenance Tips:
- Avoid Direct Water Exposure: Unless your strip is specifically rated for outdoor or wet locations (IP65, IP67, or IP68), keep it away from moisture.
- Gentle Cleaning: If the strip becomes dusty, gently wipe it with a soft, dry cloth. Avoid harsh chemicals or abrasive materials.
- Dimming: Use compatible LED dimmers and controllers. Standard incandescent dimmers are typically not suitable for LEDs and can cause flickering or damage.
- Avoid Over-bending: While flexible, LED strips have limits. Avoid bending them sharply or repeatedly at the same point, as this can damage the internal circuitry.
Troubleshooting Common Issues:
- Flickering: Often caused by an incompatible dimmer, an insufficient power supply, or loose connections. Check these first.
- Dimming at the End of the Strip: Known as “voltage drop,” this occurs in longer runs. Using a higher voltage strip (24V) or “power injecting” (connecting additional power leads at intervals along the strip) can mitigate this.
- Sections Not Lighting Up: This usually indicates a break in the circuit. Check connections, cut points, or for physical damage to the strip.
By following these guidelines, you can ensure your LED strip lights not only perform optimally but also provide a safe and stunning lighting experience for years to come.
Conclusion: Crafting Your Perfect LED Lighting Experience
The journey through the nuances of high-density LED strips, particularly the comparison between 60 and 120 LEDs per meter, reveals that the “best” choice is truly subjective, depending on your project’s unique demands. We’ve explored how 60 LEDs/meter strips offer a cost-effective and energy-efficient solution for ambient or hidden lighting, while 120 LEDs/meter strips excel in delivering superior uniformity and a seamless, professional aesthetic crucial for visible installations and task lighting. Understanding these distinctions, alongside considerations for power, heat, and application, empowers you to make an informed decision.
Ultimately, your perfect LED lighting experience is within reach when you align the right density with your vision. Don’t be afraid to test different options, consider the environmental factors, and remember that proper installation and thermal management are key to longevity. What kind of ambiance are you hoping to create with your next LED strip light project?
Frequently Asked Questions
What is the primary difference in appearance between 60 and 120 LEDs per meter?
The main difference lies in light uniformity. A 120 LEDs/meter strip produces a much smoother, more continuous line of light with virtually no visible “hotspots” or dots, especially when viewed directly or on reflective surfaces. In contrast, a 60 LEDs/meter strip may show individual LED points due to wider spacing.
Do 120 LEDs per meter strips consume significantly more power?
Yes, generally, a 120 LEDs/meter strip will consume approximately twice the power of a 60 LEDs/meter strip of the same type and length, as it has double the number of light-emitting diodes. This increased power consumption also leads to higher heat generation.
Are 120 LEDs per meter strips always brighter than 60 LEDs per meter strips?
In most cases, yes. With twice the number of LEDs, a 120 LEDs/meter strip typically produces a higher total lumen output per meter, resulting in a brighter illumination. However, the perceived brightness also depends on the quality of individual LED chips and the application.
When should I choose a 60 LEDs per meter strip over a 120 LEDs per meter strip?
You should opt for a 60 LEDs/meter strip for ambient lighting where the light source is hidden (e.g., inside coves, behind diffusers), for accent lighting where a subtle glow is desired, or for budget-sensitive projects where high visual uniformity is not the top priority.
Is special thermal management required for 120 LEDs per meter strips?
Due to their higher power consumption and increased heat generation, 120 LEDs/meter strips often benefit greatly from, and sometimes require, proper thermal management. Installing them in aluminum channels (profiles) acts as a heatsink, dissipating heat and helping to extend the lifespan of the LEDs.