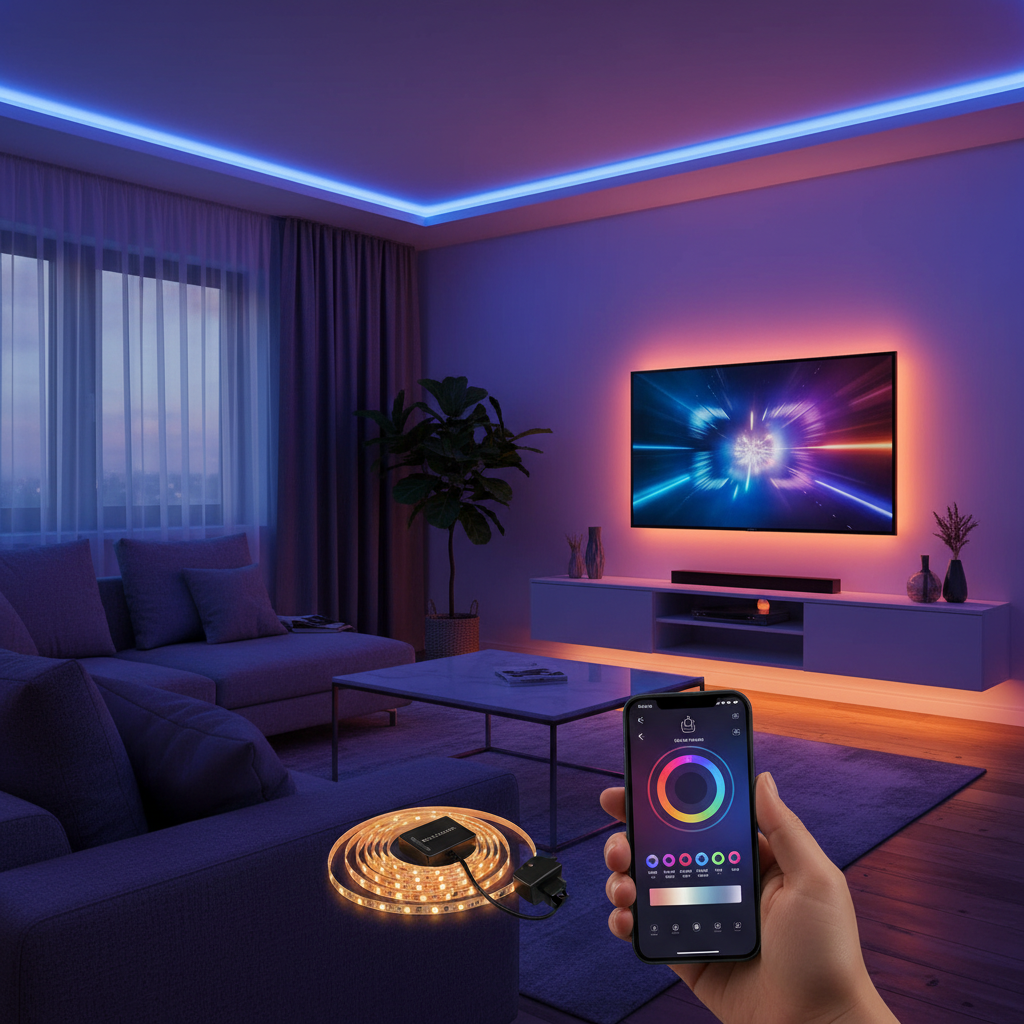
Have you ever gazed into a seemingly bottomless tunnel of light, mesmerized by its infinite reflections? That captivating optical illusion is an infinity mirror, and with the right approach, you can create one yourself. Far from a complex magic trick, a DIY infinity mirror with LED strips is an accessible and rewarding project that transforms ordinary materials into an extraordinary piece of personalized decor. This guide will walk you through every step, from understanding the science behind the illusion to selecting the perfect components and assembling your own dazzling display, ensuring you can bring this captivating effect into your home.
Understanding the Illusion: What is an Infinity Mirror?
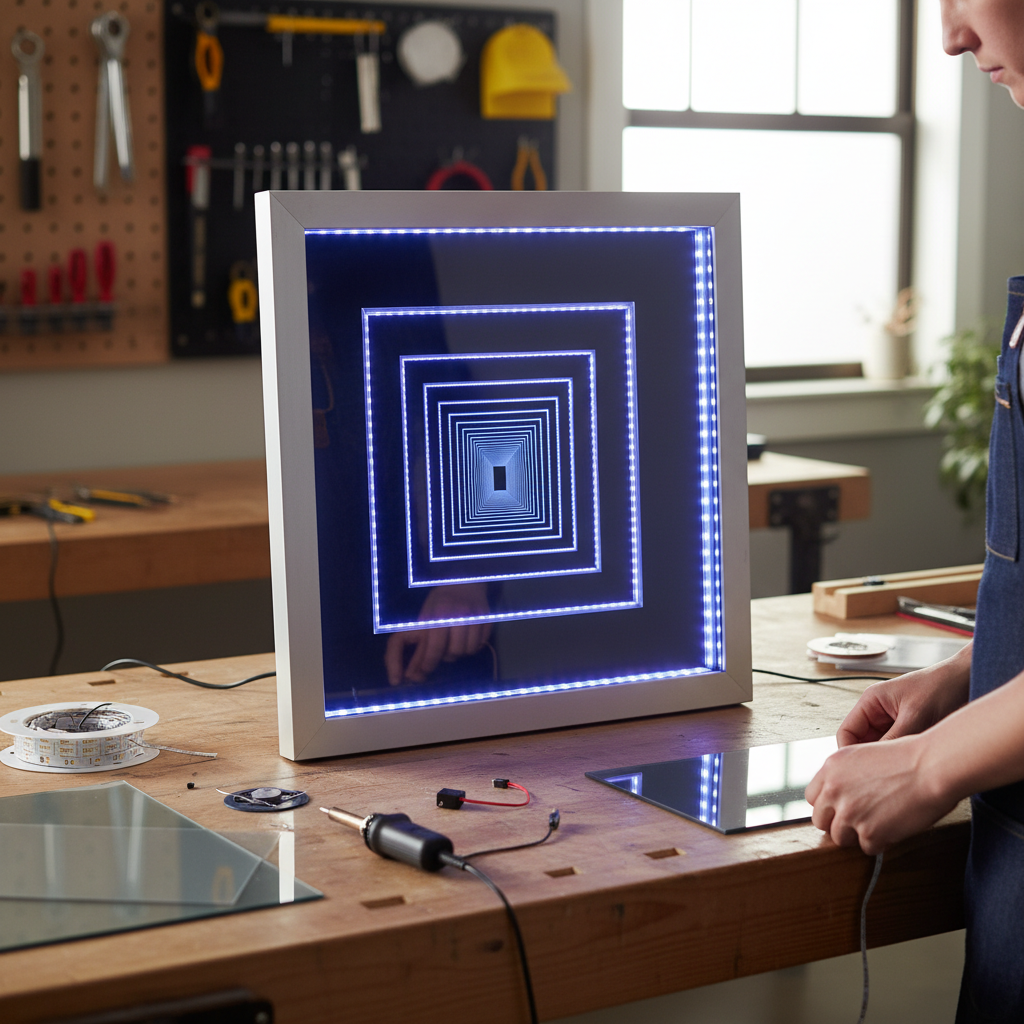
An infinity mirror is a remarkable optical illusion that creates the perception of an endless tunnel of light. At its core, this mesmerizing effect is achieved by strategically positioning two mirrors parallel to each other, with LED strip lights placed in the space between them. The back mirror is fully reflective, like a standard household mirror, bouncing all light that hits it. The front mirror, however, is partially reflective—often called a one-way or two-way mirror. It reflects some light back into the chamber while allowing a portion to pass through to your eyes.
The magic happens as the light from the LEDs continuously reflects between these two parallel surfaces. Each time light bounces between the mirrors, a small amount escapes through the partially reflective front, appearing to recede further and further into the distance. This repeated reflection, with each subsequent reflection becoming slightly dimmer, generates the captivating illusion of an infinitely deep tunnel lined with lights. These intriguing pieces are not just scientific curiosities; they are widely used in modern home decor, art installations, retail displays, and entertainment venues to add a dynamic and futuristic visual element.
Why Build Your Own LED Infinity Mirror?
The allure of a DIY LED infinity mirror goes beyond just owning a unique piece of decor. Crafting one yourself offers a host of compelling advantages, making it a truly rewarding endeavor for any maker or design enthusiast.
First and foremost is the customization and personalization aspect. Unlike mass-produced items, a DIY infinity mirror can be tailored precisely to your vision. Choose your frame material, size, the color and type of LED strips, and even add smart controls for dynamic lighting effects that perfectly match your aesthetic and space. Secondly, cost-effectiveness is a significant benefit. While pre-made infinity mirrors can be expensive, building your own often allows you to achieve a similar or even superior effect for a fraction of the price, especially if you source materials smartly.
Beyond the tangible product, there’s immense educational value. This project provides a hands-on opportunity to delve into basic optics, electrical wiring, and even coding if you choose to integrate programmable LEDs. It’s a fantastic way to understand light reflection and transmission. Finally, the unique aesthetic and ambiance an infinity mirror provides are unparalleled. It adds a sophisticated, futuristic, and conversation-starting focal point to any room, enhancing depth and creating an immersive atmosphere. The sense of accomplishment you’ll feel when you switch on your creation and witness the endless tunnel of light is, quite simply, priceless.
Choosing Your Components: A Guide to Mirrors and LEDs
The heart of your infinity mirror lies in its reflective surfaces and light source. Selecting the right components is crucial for achieving a stunning and durable illusion.
Mirrors: The Gateway to Infinity
|
Our Picks for the Best LED strip light in 2026
As an Amazon Associate I earn from qualifying purchases.
|
||
| Num | Product | Action |
|---|---|---|
| 1 | Barrina (6 Pack LED T5 Integrated Single Fixture, 4FT, 2200lm, 6500K Super Bright White, 20W Utility LED Shop Light, Ceiling and Under Cabinet Light, Corded Electric with ON/Off Switch, ETL Listed |

|
| 2 | Govee RGBIC LED Strip Lights, Smart LED Lights for Bedroom, Bluetooth LED Lights APP Control, DIY Multiple Colors on One Line, Color Changing LED Strip Lighting Music Sync, Home Decor, 16.4ft |
|
| 3 | DAYBETTER Led Strip Lights 32.8ft Kit with Remote and Power Supply Color Changing |
|
| 4 | KSIPZE 100ft Led Strip Lights RGB Music Sync Color Changing Led Lights with Smart App Control Remote Led Lights for Bedroom Room Lighting Flexible Home Décor |
|
| 5 | Govee 100ft RGBIC LED Strip Lights, Smart LED Lights Work with Alexa and Google Assistant, LED Lights for Bedroom WiFi App Control Segmented DIY Multiple Colors, Color Changing Light, (2 x 50ft) |
|
| 6 | Govee White LED Strip Lights, Upgraded 16.4ft Dimmable LED Light Strip 6500K Bright Daylight White, Strong Adhesive, 300 LEDs Flexible Tape Lights for Mirror, Kitchen Cabinet, Bedroom, Christmas Decor |
|
| 7 | NBBUFF Led Lights for Bedroom 50ft (1 Roll), Color Changing RGB Led Strip Lights with 60 Keys Remote and App Control, Music Sync Led Lights for Room Kitchen Party Home Decor |
|
| 8 | White Led Strip Lights for Bedroom Small Dimmable LED Lights Strip 16.4ft Super Bright Flexible LED Tape Lights Rope Light for for Room Home Decor Luces Leds for Living Room Kitchen Vanity Mirror |
|
| 9 | DAYBETTER LED Strip Lights 110ft, Smart Lighting Strips with App Remote Control, RGB Music Sync Color Changing Lights for Bedroom Kitchen Party Home Decor Luces led para cuarto (1 Roll) |
|
| 10 | dalattin White LED Strip Lights, 20ft Dimmable Super Bright 24V Led Tape Light 6500K 360 LEDs Lights for Bedrooms, Mirror, Kitchen, Home Decoration Daylight White |
|
You will need two main reflective components: a fully reflective mirror for the back and a partially reflective mirror for the front.
| Mirror Type | Description | Pros | Cons |
|---|---|---|---|
| Fully Reflective Mirror | Standard mirror glass or silver mirror acrylic, placed at the back of the frame. | Creates crisp, 100% reflection. Acrylic is lighter, shatter-resistant, and easier to cut. | Glass can be heavy and fragile. |
| Partially Reflective Mirror | Also known as a two-way or one-way mirror. This is the viewing surface. It reflects some light back into the frame and allows some to pass through. | Essential for the infinity effect. High-quality options provide deep, clear reflections. | Lower quality versions can lead to a dim or distorted effect. |
| Two-Way Mirror Glass/Acrylic | Specialty mirror with a thin metallic coating. Recommended for optimal results, often with 65-70% reflectivity. | Superior optical clarity, less prone to bubbling than film, creates a very defined tunnel effect. | More expensive than film. Acrylic version is safer and lighter than glass. |
| Clear Glass/Acrylic with Film | A budget-friendly alternative where a reflective window tint film (e.g., 30-40% VLT) is applied to a clear pane of glass or acrylic. | More affordable, offers control over reflectivity percentage. | Film application can be tricky, prone to bubbles, and may not be as crisp as dedicated two-way mirrors. |
For larger projects or those requiring enhanced safety, acrylic mirrors (both fully reflective and two-way) are often preferred due to their lighter weight and shatter-resistant properties.
LED Strips: Illuminating the Endless Tunnel
The LED strips are your light source, bringing the infinity effect to life with vibrant colors and dynamic patterns.
| LED Strip Type | Description | Pros | Cons |
|---|---|---|---|
| RGB LED Strips | Standard color-changing LED strips that can display a wide range of colors. Usually controlled by a remote. | Affordable, easy to use, offers basic color control. | All LEDs on the strip display the same color at any given time, limiting complex animations. |
| Addressable LED Strips | Such as WS2812B or NeoPixels. Each LED on the strip can be controlled individually, allowing for complex and dynamic light patterns, chases, and animations. Requires a microcontroller (e.g., Arduino). | Highly customizable, capable of intricate light shows, interactive effects (e.g., sound-reactive). | Requires a microcontroller and basic programming knowledge (though many libraries simplify this). Higher cost per meter. |
| White/Warm White LEDs | Single-color LED strips (pure white, warm white, dual white) for a classic, elegant infinity effect without color changes. | Simple, cost-effective, ideal for minimalist designs or specific ambient lighting. | No color-changing capabilities. |
Key LED Considerations:
- LED Density: Strips with higher LED density (e.g., 60+ LEDs per meter) create a smoother, more continuous line of light, enhancing the “tunnel” effect. Lower density might make individual LEDs more noticeable.
- Voltage: Common voltages are 5V, 12V, or 24V. Ensure your power supply matches the strip’s voltage. 5V strips are often used with microcontrollers like Arduino.
- Brightness: LEDs should be bright enough to create a clear reflection but not so bright as to overwhelm the illusion or become uncomfortably intense.
- Placement: For the best optical illusion, recess the LED strips slightly behind any bezel or frame edge so they are not directly visible when looking into the mirror.
Essential Materials and Tools for Your DIY Project
To successfully build your DIY infinity mirror, gathering the right materials and tools beforehand is key. This project is accessible to beginners, but precision and attention to detail will ensure a stunning final product.
Materials:
- Frame: A shadowbox frame or a custom-built frame made from wood (e.g., MDF), metal, or acrylic. Crucially, it needs to have a depth of at least 1.5 to 2 inches (approximately 4-5 cm) to allow for sufficient space for the LEDs and the illusion of depth.
- Fully Reflective Mirror: A standard mirror (glass or acrylic) to serve as the back panel.
- Partially Reflective Mirror:
- Option 1 (Recommended): A two-way mirror (glass or acrylic) with approximately 65-70% reflectivity.
- Option 2 (Budget-friendly): A clear glass or acrylic sheet, plus a roll of reflective window tint film (e.g., 30-40% Visible Light Transmission, or VLT).
- LED Strip Lights: As discussed, choose RGB, addressable (e.g., WS2812B), or single-color strips. Ensure sufficient length for your frame’s perimeter.
- Compatible Power Supply: A power adapter (e.g., 5V, 12V, or 24V DC) with enough amperage to power your chosen LED strip. Consult the LED strip’s specifications.
- Wire Connectors: If you need to extend or connect multiple LED strip segments.
- Adhesive:
- Double-sided tape or hot glue (for attaching LED strips).
- Super glue or epoxy (for securing mirrors and frame components).
- Black Paint or Tape (Optional but Recommended): For blacking out the interior edges of the frame to prevent light leaks and enhance the illusion.
- Optional for Advanced Control: An Arduino Nano Every or similar microcontroller, prototyping wires, a breadboard, a filter capacitor, and a resistor (for power spike mitigation with high-current addressable LEDs).
Tools:
- Cutting Tool:
- Scissors or a utility knife (for cutting LED strips and mirror film).
- Saw (if modifying a wooden frame or cutting custom frame pieces). A Dremel or similar tool can also work for smaller cuts.
- Drill: To create a small hole in the frame for the LED strip’s power cable.
- Screwdriver/Clamps: For assembling and securing frame components.
- Anti-static Cleaner and Lint-Free Cloth: For thoroughly cleaning mirror surfaces.
- Credit Card or Squeegee: Essential for smoothing out air bubbles if applying mirror film.
- Safety Glasses: Always wear eye protection when cutting or handling glass/acrylic.
Gathering these materials and tools will prepare you for a smooth and enjoyable building process, culminating in your very own enchanting infinity mirror.
Step-by-Step: Assembling Your Infinity Mirror with LEDs
Crafting your infinity mirror is a straightforward process that combines careful preparation with precise assembly. Follow these steps to bring your endless light tunnel to life:
1. Prepare the Frame
Begin by selecting your frame. If using a shadowbox, carefully disassemble it, removing the backing board and any existing glass or acrylic sheets. For a custom frame, ensure it has a minimum depth of 1.5 to 2 inches (4-5 cm) to provide adequate space for the LEDs and the depth illusion. To prevent light leaks that can spoil the effect, paint the interior edges of the frame matte black or line them with black tape. Next, use a drill or saw to create a small, neat hole in an inconspicuous spot on the frame (e.g., the bottom edge) to pass the LED strip’s power cable through. Ensure the hole is wide enough for the wire but not excessively large.
2. Install LED Strips
Measure the perimeter of your frame’s inner edge where the LEDs will sit. Cut your LED strip lights to the correct length at the designated cutting marks (usually indicated by copper pads or scissor icons). Peel the adhesive backing from the LED strip and carefully press it firmly along the inner sides of your frame. Start from one corner and work your way around, ensuring an even, continuous application. Thread the power cable of the LED strip through the pre-drilled hole in your frame. For the best optical effect, position the LEDs so they are slightly recessed or hidden from direct view, allowing only their light to be reflected.
3. Prepare the Front Mirror (If Using Film)
If you’ve opted for clear glass or acrylic and reflective film, this step requires patience. Clean the clear sheet meticulously with an anti-static cleaner and a lint-free cloth to remove any dust or streaks. In a clean environment, spray both the glass/acrylic surface and the adhesive side of the film liberally with soapy water (a few drops of dish soap in a spray bottle of water works well). Carefully apply the film to the wet surface, positioning it accurately. Use a squeegee or a credit card to gently but firmly push out all water and air bubbles from the center outwards. Trim any excess film with a sharp knife or razor blade. Ensure the reflective side of the film will face inward towards the LEDs when assembled.
4. Assemble the Layers
Now, it’s time to bring all the components together.
- Back Layer: Place your fully reflective mirror (standard mirror glass or silver mirror acrylic) at the very back of your prepared frame. Ensure it sits securely and is clean.
- Middle Layer: Carefully insert the frame piece with your installed LED strips. Make sure the LEDs are facing inward towards the center of the mirror and that the power cable passes cleanly through the drilled hole.
- Front Layer: Position your partially reflective mirror (either the two-way mirror glass/acrylic or the clear sheet with applied film) at the front of the frame. The reflective side of this mirror must face inward, towards the LED strips.
5. Secure and Seal
Once all layers are correctly aligned, secure them firmly within the frame. Depending on your frame type, this might involve bending metal tabs, using small screws, or applying a strong adhesive (like epoxy) along the edges. It’s critical to seal all components tightly to prevent any light from escaping from the sides, which can diminish the illusion. Ensure the mirrors are parallel to each other for the most effective infinite tunnel.
6. Wire and Test
Connect your LED strip’s power cable to its compatible power supply. If you’re using an Arduino or microcontroller for addressable LEDs, connect the data, power, and ground lines according to your specific setup (always connect ground first). Plug in the power supply. Dim the room lights, and watch as your DIY infinity mirror comes to life, creating a breathtaking, endless tunnel of light.
Achieving the Perfect Illusion: Tips and Troubleshooting
While building an infinity mirror is an exciting project, a few expert tips and common troubleshooting solutions can help you perfect the illusion and ensure lasting enjoyment.
Tips for a Flawless Effect:
- Prioritize Quality Materials: The clarity and depth of your infinity effect heavily depend on the quality of your mirrors. Invest in high-quality two-way mirror glass or acrylic, or a reputable reflective film. Cheaper alternatives might produce a hazier or less defined illusion.
- Blackout All Edges: Even tiny light leaks from the sides of your frame can detract from the illusion. Ensure all interior edges are completely opaque, ideally by painting them matte black or lining them with dark, non-reflective tape.
- Optimal Frame Depth: Aim for a frame depth of at least 1.5 to 2 inches (4-5 cm). This space allows for more reflections to form between the mirrors, creating a deeper and more convincing tunnel effect. A shallower frame will result in a less pronounced illusion.
- Even LED Spacing and Brightness: For a smooth, continuous tunnel of light, ensure your LED strips are evenly spaced and positioned. Overly bright LEDs can sometimes wash out the effect, so consider dimmable strips. Addressable LEDs (like WS2812B) with a high density (e.g., 60+ LEDs/meter) offer the best visual continuity and animation possibilities.
- Dim the Room Lights: The infinity effect is most striking in a dimly lit or dark room. Ambient light can reduce the perceived depth and make the illusion less impactful.
- Consider Arduino Control: If you’re using addressable LED strips, integrating an Arduino microcontroller allows for highly customizable light shows, color-changing sequences, and even interactive or sound-reactive effects, elevating your mirror to an art piece.
Troubleshooting Common Issues:
- Faint or Blurry Illusion:
- Check Mirror Quality: Lower-quality two-way mirrors or improperly applied film can cause blurriness.
- Light Leaks: Inspect the frame for any gaps where light might be escaping. Seal them immediately.
- Insufficient Depth: A frame that’s too shallow won’t allow enough reflections to create a deep tunnel.
- Uneven LEDs: Ensure your LED strips are evenly placed and not too far apart.
- Bubbles Under Mirror Film:
- This is common. If significant, carefully try to re-apply the film using a fresh soapy water solution and a squeegee, working from the center outward. Small bubbles might dissipate over time or be less noticeable.
- LEDs Not Working or Flickering:
- Power Supply: Verify that your power supply matches the LED strip’s voltage and provides sufficient amperage. An underpowered supply can cause flickering or dimness.
- Connections: Double-check all wiring connections (power, ground, data) for proper contact. Ensure LEDs are cut only at designated points.
- Damaged Strip: If a section isn’t working, the strip might be damaged.
- Uneven Lighting:
- Ensure LED strips are evenly installed and secured. Also, verify that the power is distributed correctly across the strip, especially for longer runs.
Safety First:
- Handle Glass Carefully: Always wear safety glasses and gloves when cutting or handling glass/acrylic to prevent injury.
- Electrical Safety: Ensure all electrical connections are secure and insulated. Use a power supply that meets the specifications of your LED strips to prevent overheating or electrical hazards. If unsure, consult with an electrician.
By paying attention to these details, you can overcome common challenges and create a dazzling, perfectly functioning infinity mirror that will be a constant source of wonder.
Conclusion
Creating a DIY infinity mirror with LED strips is a truly captivating project that combines the magic of optical illusions with the satisfaction of hands-on crafting. From understanding the scientific principles of reflection to carefully selecting your mirrors and LED strips, each step brings you closer to illuminating an endless tunnel of light. By following the detailed guide, preparing your frame with care, precisely installing your lighting, and assembling the layers, you’ve not only built a unique piece of decor but also gained valuable insights into electronics and design.
The customizable nature of this project means your infinity mirror can be a personal reflection of your style, adding a touch of futuristic elegance, vibrant color, or subtle ambiance to any space. The mesmerising depth and dynamic light effects are sure to spark conversation and delight for years to come. So, are you ready to dive into the endless possibilities and light up your world with this stunning illusion?
Frequently Asked Questions
How does an infinity mirror create the illusion of depth?
An infinity mirror creates the illusion of infinite depth through the strategic placement of two parallel mirrors: one fully reflective at the back and one partially reflective (a two-way mirror) at the front, with LED lights in between. Light from the LEDs bounces repeatedly between these two surfaces, with a small portion passing through the front mirror each time, gradually diminishing in intensity. This diminishing repetition creates the visual effect of lights receding into an endless tunnel.
What type of mirrors are best for an infinity mirror?
For the best effect, use a standard fully reflective mirror (glass or acrylic) for the back. For the front, a high-quality two-way mirror (glass or acrylic) with about 65-70% reflectivity is ideal. As a more budget-friendly option, a clear glass or acrylic sheet with a reflective window tint film (30-40% VLT) can also be used, though application requires care to avoid bubbles.
Can I use any LED strip lights for my infinity mirror?
While most LED strip lights can work, for the most impressive effects, consider RGB or addressable LED strips (like WS2812B) with a high LED density (e.g., 60+ LEDs per meter). RGB strips offer basic color changes, while addressable strips allow for individual LED control, enabling complex and dynamic light animations. Ensure your power supply matches the LED strip’s voltage (e.g., 5V, 12V, or 24V).
How deep should the frame be for an optimal infinity effect?
For an optimal and convincing infinity effect, the frame should have a minimum depth of 1.5 to 2 inches (approximately 4-5 cm). This space between the two mirrors is crucial as it allows sufficient room for the light to bounce back and forth multiple times, thereby creating a more profound and dramatic illusion of endless depth.
Is it hard to make a DIY infinity mirror?
Making a DIY infinity mirror is generally considered a beginner-friendly project. While it requires attention to detail, especially with mirror placement and film application (if used), the steps are straightforward. With common tools and readily available materials, most DIY enthusiasts can successfully complete this project and achieve a stunning result.
What are common mistakes to avoid when building an infinity mirror?
Common mistakes include insufficient frame depth, light leaks from the frame edges, poor quality or scratched mirrors/film, unevenly spaced or underpowered LED strips, and bubbles when applying mirror film. To avoid these, ensure your frame is deep enough and sealed, use quality materials, and apply film meticulously with soapy water and a squeegee.