LED strip lights have revolutionized home and commercial lighting, offering unmatched versatility, energy efficiency, and vibrant aesthetics. However, many DIY enthusiasts and professionals often face a common hurdle: how to connect or extend these strips without the complexities of soldering. While soldering provides a highly reliable connection, it requires specialized tools, skills, and can be time-consuming and potentially damaging if not done correctly. Thankfully, the world of LED lighting has evolved to offer ingenious solderless solutions, making it simpler than ever to customize your lighting projects with ease and confidence.
Solderless LED Connections: An Overview
LED strip lights are flexible circuit boards embedded with light-emitting diodes, offering a continuous line of illumination. When you need to cut these strips to size, combine different sections, or connect them to a power source, a reliable electrical connection is crucial. Traditionally, this involved soldering – a method of joining metal pieces using a molten filler metal. While effective, soldering presents several drawbacks: it demands a steady hand, specific tools like a soldering iron and flux, and generates heat and fumes, posing a risk to both the user and the delicate LED components. Improper soldering can lead to flickering lights, short circuits, or even permanent damage to your LED strip.
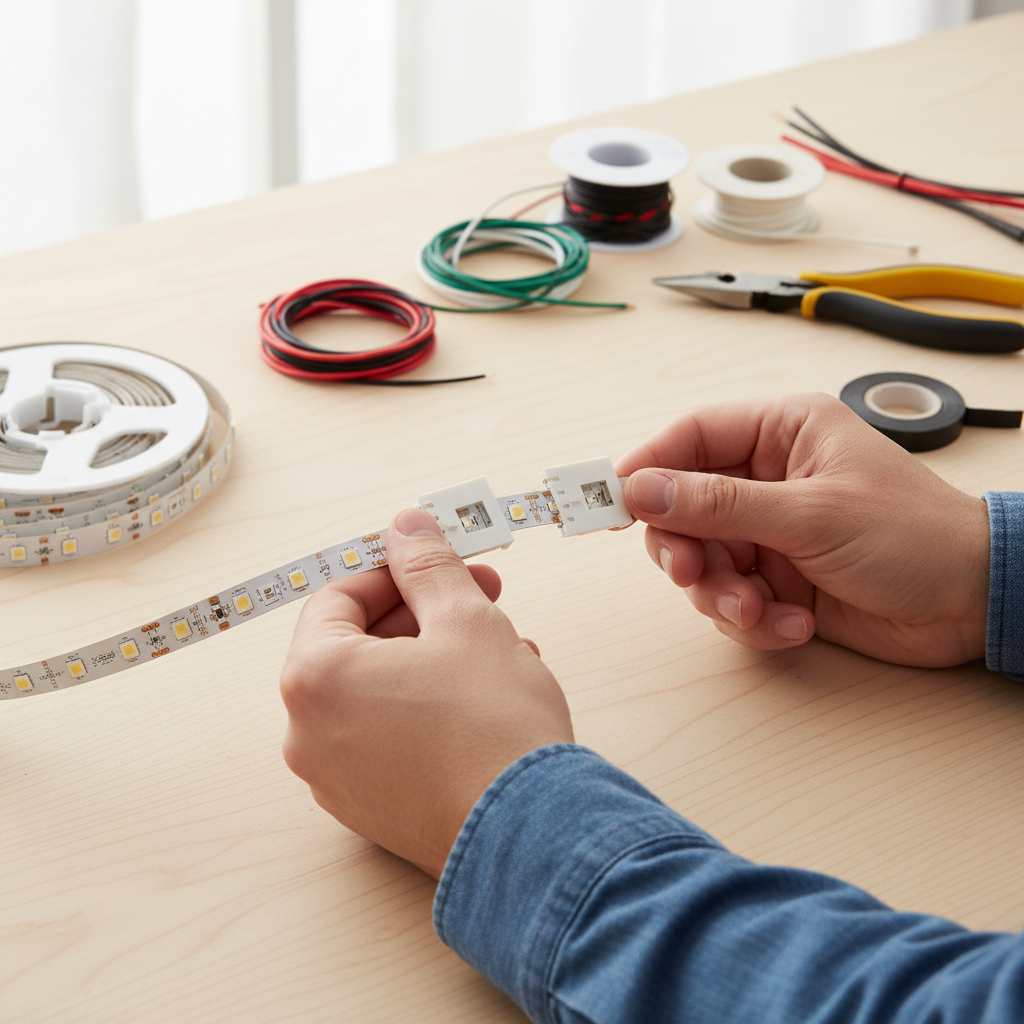
This is where solderless LED connectors come in. These innovative devices offer a “plug-and-play” alternative, allowing you to establish secure electrical connections without any heat or complex techniques. Solderless connectors typically work by clamping onto the copper pads of the LED strip, often using sharp teeth or conductive prongs to pierce the pads and complete the circuit. This creates a robust mechanical and electrical bond, streamlining your installation process significantly.
The Undeniable Advantages of Solderless LED Connectors
Opting for solderless connectors over traditional soldering brings a host of benefits that make them a preferred choice for many LED lighting projects.
- Quick and Easy Installation: The most significant advantage is the speed and simplicity of installation. Solderless connectors eliminate the need for heating tools, special training, or advanced technical know-how, making LED projects accessible to everyone from beginners to seasoned DIYers. You can connect your LED strips in seconds, saving valuable time and effort.
- Enhanced Safety: Without the use of high heat or potentially hazardous chemicals, solderless connections are inherently safer. There’s no risk of burns, smoke inhalation, or accidental damage to the LED strip due to excessive heat. This makes them ideal for home use and projects where safety is a top priority.
- Increased Flexibility: Solderless connectors are perfect for projects that may require future adjustments, repositioning, or temporary installations. They allow for easy disconnection and reconnection, providing unmatched flexibility compared to permanent soldered joints.
- Clean and Professional Finish: These connectors provide a neat, organized appearance without the messy residue often associated with soldering. Many are designed to be compact and can even fit within aluminum profiles for a discreet and professional look.
- No Specialized Tools Required: Beyond basic tools like wire strippers or pliers, you won’t need an arsenal of specialized equipment. This reduces the initial investment and simplifies the overall process.
“Solderless connectors empower anyone to become an LED lighting designer. They remove the barriers of technical skill, making sophisticated lighting setups achievable for every enthusiast.” – John Doe, LED Lighting Solutions Architect
Types of Solderless LED Connectors for Every Project
The market offers a diverse range of solderless connectors, each designed for specific applications and LED strip types. Understanding these variations is key to choosing the right connector for your project.
By Function
- Strip-to-Wire Connectors: These are used to connect an LED strip segment directly to a power supply wire or an extension wire. They typically have a connector on one end for the LED strip and open terminals or a clamp on the other for a stripped wire.
- Strip-to-Strip Connectors: Ideal for extending the length of an LED strip or connecting two strips around corners, these connectors join two LED strip segments directly. They come in various configurations:
- Straight Connectors: For extending strips in a continuous line.
- L-Shape (Corner) Connectors: Perfect for making 90-degree turns without bending the strip, which can damage internal circuitry.
- T-Shape and X-Shape (Cross) Connectors: Used for creating branches or splitting a single power feed into multiple strip directions.
|
Our Picks for the Best LED strip light in 2026
As an Amazon Associate I earn from qualifying purchases.
|
||
| Num | Product | Action |
|---|---|---|
| 1 | dalattin White LED Strip Lights, 20ft Dimmable Super Bright 24V Led Tape Light 6500K 360 LEDs Lights for Bedrooms, Mirror, Kitchen, Home Decoration Daylight White |

|
| 2 | KSIPZE 100ft Led Strip Lights RGB Music Sync Color Changing Led Lights with Smart App Control Remote Led Lights for Bedroom Room Lighting Flexible Home Décor |
|
| 3 | White Led Strip Lights for Bedroom Small Dimmable LED Lights Strip 16.4ft Super Bright Flexible LED Tape Lights Rope Light for for Room Home Decor Luces Leds for Living Room Kitchen Vanity Mirror |
|
| 4 | Govee RGBIC LED Strip Lights, Smart LED Lights for Bedroom, Bluetooth LED Lights APP Control, DIY Multiple Colors on One Line, Color Changing LED Strip Lighting Music Sync, Home Decor, 16.4ft |
|
| 5 | Barrina (6 Pack LED T5 Integrated Single Fixture, 4FT, 2200lm, 6500K Super Bright White, 20W Utility LED Shop Light, Ceiling and Under Cabinet Light, Corded Electric with ON/Off Switch, ETL Listed |
|
| 6 | DAYBETTER Led Strip Lights 32.8ft Kit with Remote and Power Supply Color Changing |
|
| 7 | Govee White LED Strip Lights, Upgraded 16.4ft Dimmable LED Light Strip 6500K Bright Daylight White, Strong Adhesive, 300 LEDs Flexible Tape Lights for Mirror, Kitchen Cabinet, Bedroom, Christmas Decor |
|
| 8 | NBBUFF Led Lights for Bedroom 50ft (1 Roll), Color Changing RGB Led Strip Lights with 60 Keys Remote and App Control, Music Sync Led Lights for Room Kitchen Party Home Decor |
|
| 9 | DAYBETTER LED Strip Lights 110ft, Smart Lighting Strips with App Remote Control, RGB Music Sync Color Changing Lights for Bedroom Kitchen Party Home Decor Luces led para cuarto (1 Roll) |
|
| 10 | Govee 100ft RGBIC LED Strip Lights, Smart LED Lights Work with Alexa and Google Assistant, LED Lights for Bedroom WiFi App Control Segmented DIY Multiple Colors, Color Changing Light, (2 x 50ft) |
|
By Pin Configuration
The number of pins on a connector must match the number of contact pads on your LED strip, which corresponds to its color capability:
- 2-Pin Connectors: Used for single-color LED strips (e.g., warm white, cool white, red, blue), which only require a positive (+) and negative (-) connection.
- 3-Pin Connectors: Commonly used for tunable white LED strips, allowing control over color temperature.
- 4-Pin Connectors: Designed for RGB (Red, Green, Blue) LED strips, which have a common positive line and separate lines for each color.
- 5-Pin Connectors: For RGBW (Red, Green, Blue, White) LED strips, adding a dedicated white channel for purer white light.
- 6-Pin Connectors: For RGBCCT (Red, Green, Blue, Cool White, Warm White) LED strips, offering full color and tunable white capabilities.
By Environment and IP Rating
- IP20 (Non-Waterproof) Connectors: These are standard indoor connectors, suitable for dry environments where they won’t be exposed to moisture or dust.
- IP65, IP67, IP68 (Waterproof) Connectors: Essential for outdoor installations, bathrooms, kitchens, or any area prone to moisture. These connectors feature robust sealing, often with silicone or gel, to protect the connection from water ingress.
Step-by-Step Guide: Splicing LED Wires Without Soldering
Connecting LED strip lights with solderless connectors is a straightforward DIY task. Follow these steps for a secure and functional setup:
1. Gather Your Tools & Materials
Before you begin, ensure you have the following:
- LED Strip Light: The strip you intend to connect.
- Solderless LED Connectors: The appropriate type (strip-to-wire, strip-to-strip) and pin configuration (2-pin, 4-pin, etc.) for your project.
- Wire Strippers or Precision Knife: If connecting to wires.
- Small Pliers: To help secure connections.
- Power Supply: To test your connections.
- Electrical Tape or Heat Shrink Tubing: For insulation and added security.
- Silicone Sealant (Optional): For waterproof connections in wet environments.
2. Prepare the LED Strip
Always disconnect the power supply before handling LED strips.
- Cut the Strip: Carefully cut your LED strip along the designated cut lines, typically marked with copper pads and a scissor icon. Cutting elsewhere can damage the circuit.
- Remove Adhesive (if applicable): For many strip-to-connector types, you’ll need to peel back about 1/4 inch (5-8mm) of the 3M adhesive backing and its protective film from the end of the strip where the connector will attach. This ensures the strip fits properly and makes solid contact.
3. Prepare Wires (if connecting to wire)
If you are using strip-to-wire connectors:
- Strip Insulation: Use wire strippers to carefully remove about 5-8mm (1/4 to 3/8 inch) of insulation from the end of the wires you’ll be connecting. Ensure the wire gauge (thickness) is compatible with your connector (often 20 AWG for LED strips).
4. Make the Connection
This is the core step where you join the LED strip and wires (or another strip) to the connector.
- Open the Connector: Lift the clear plastic cover or pull out the small tray on the solderless connector.
- Align Polarity: Crucially, align the positive (+) and negative (-) markings on your LED strip with the corresponding markings on the connector. For RGB strips, ensure R, G, B, and W (if applicable) pads align with the correct connector terminals. While wire colors often follow conventions (red for positive, black for negative), always verify with the strip’s markings.
- Insert the Strip: Gently slide the prepared end of the LED strip into the connector. Make sure the copper pads on the strip sit directly under the metal prongs inside the connector. Push it in until it hits the backstop and is snugly in place.
- Insert the Wire (if applicable): If connecting to a wire, insert the stripped end of the wire into its designated terminal in the connector, ensuring no stray strands cause a short circuit.
- Secure the Connection: Firmly press down the clear plastic cover or snap the lid shut until it clicks into place. You might need pliers to apply enough force, especially for robust clip-down types. Ensure the connector is fully closed and the metal teeth have pierced the copper pads, creating a tight, secure bond. Give the strip or wire a gentle tug to confirm it’s held firmly and won’t slip out.
5. Test Your Connection
- Power On: Briefly connect your LED setup to the power supply.
- Inspect: Check if the LED strip lights up evenly and consistently without any flickering or dead spots. If there are issues, recheck the alignment and tightness of the connection.
6. Secure and Insulate
Once you’ve confirmed a successful connection:
- Insulate Exposed Wires: For any exposed wire connections, wrap them securely with electrical tape or use heat shrink tubing for a clean, insulated finish.
- Waterproof (if needed): If your installation is in a damp or outdoor environment, apply a silicone sealant around the connector joints to ensure a watertight seal. Always use waterproof connectors for these applications.
Choosing the Right Solderless LED Connector: A Buying Guide
Selecting the optimal solderless connector is crucial for the longevity and performance of your LED lighting system. Consider these factors:
- Match LED Strip Type: The most important consideration is the type of LED strip you have (single color, RGB, RGBW, RGBCCT). This dictates the number of pins required for the connector.
- Consider the Environment: For indoor, dry applications, standard IP20 connectors are sufficient. For outdoor, humid, or potentially wet areas, always opt for IP65, IP67, or IP68 rated waterproof connectors.
- Connector Width: LED strips come in various widths (e.g., 8mm, 10mm, 12mm). Ensure your connector matches the width of your LED strip’s PCB for a secure fit.
- Quality and Brand Reputation: Invest in connectors from reputable manufacturers. High-quality connectors are made from durable materials that ensure a stable electrical connection and resist degradation over time. Look for positive user reviews and certifications.
- Ease of Use: While all solderless connectors aim for ease of use, some designs might be more intuitive for specific projects or skill levels.
Top Brands for Reliable Solderless LED Connectors
When selecting solderless LED connectors, prioritize brands known for quality, durability, and a wide range of compatible products. Look for manufacturers that specialize in LED accessories and have a strong track record. Reputable brands often provide clear installation instructions and good customer support. Check product reviews from other users to gauge reliability and ease of use in real-world scenarios. Popular online retailers and specialized lighting stores typically stock various options, so you can compare features and pricing to find the best fit for your specific needs.
Common Issues and Troubleshooting Solderless Connections
Even with the simplicity of solderless connectors, occasional issues can arise. Here’s how to troubleshoot common problems:
- Flickering or No Light:
- Poor Contact: This is the most frequent issue. Re-open the connector and ensure the LED strip’s copper pads (and wires, if applicable) are perfectly aligned with the connector’s metal prongs and fully inserted. Re-clamp firmly, potentially using pliers for a tighter seal.
- Incorrect Polarity: Double-check that the positive (+) and negative (-) terminals (and RGB channels) are matched correctly on both the strip and the connector.
- Damaged Strip or Connector: Inspect the LED strip for any visible damage or scorching near the cut line. Also, check the connector itself for any bent pins or broken plastic.
- Insufficient Power: Ensure your power supply is adequate for the length of the LED strip you’re trying to power.
- Loose Connections: If the connection feels wobbly or easily detaches, it wasn’t clamped down securely enough. Apply more pressure, possibly with pliers, until you hear a distinct click, indicating a tight lock. Consider adding electrical tape around the connector for extra stability.
- Inconsistent Brightness: This can indicate a partial connection or an issue with power distribution. Re-check all connections in the affected section.
- Water Damage (for outdoor installations): If non-waterproof connectors are used in wet conditions, or if waterproof connectors are not properly sealed, moisture can lead to short circuits. Ensure all outdoor connections use appropriate IP-rated connectors and are sealed thoroughly with silicone sealant.
Conclusion
Splicing LED wires without soldering has transformed the landscape of DIY and professional LED lighting projects. By embracing the simplicity and efficiency of solderless connectors, you can achieve beautiful, customized lighting installations with minimal effort and specialized tools. These versatile components offer a safe, fast, and flexible way to extend, connect, and power your LED strip lights, opening up a world of creative possibilities. So, next time you envision a dazzling LED lighting design, remember that a seamless, solderless connection is just a clip away. What exciting LED project will you embark on next with these convenient connectors?
Frequently Asked Questions
Can solderless LED connectors be used for all types of LED strips?
Solderless connectors are available for most common LED strip types, including single-color, RGB, RGBW, and RGBCCT, each requiring a specific pin configuration (2-pin, 4-pin, 5-pin, etc.) to match the strip’s contact pads. Always ensure the connector’s pin count and width match your LED strip.
Are solderless connections as reliable as soldered connections?
While soldering is often considered the most permanent and reliable connection method, modern high-quality solderless connectors offer excellent reliability for most applications, especially when installed correctly. They are particularly suitable for projects that might require future adjustments or temporary setups.
Do I need to strip the wires before using solderless connectors?
Yes, if you are using a strip-to-wire connector, you typically need to strip about 5-8mm (1/4 to 3/8 inch) of insulation from the end of the wire to ensure direct electrical contact with the connector’s terminals. However, some newer “pierce-to-contact” wire connectors might not require stripping.
Can solderless connectors be used for outdoor LED strip installations?
Yes, there are specially designed waterproof solderless connectors with IP ratings like IP65, IP67, or IP68. These are crucial for outdoor or high-moisture environments, as they feature enhanced sealing to protect the electrical connection from water and humidity.
What should I do if my LED strip light flickers after using a solderless connector?
Flickering usually indicates a poor connection. First, ensure the connector is fully clamped down and that the LED strip’s copper pads are perfectly aligned with the connector’s metal prongs. Verify polarity and inspect the strip and connector for any damage. Re-making the connection firmly often resolves the issue.