Transforming your space with vibrant LED strip lighting is an exciting endeavor, offering endless possibilities for ambiance and accent. However, the dream often meets a frustrating reality when attempting to adhere these flexible lights to textured walls. If you’ve experienced the disappointment of sagging or falling strips, you’re not alone. The inherent unevenness of textured surfaces like orange peel or popcorn walls presents a unique challenge that standard LED strip adhesives simply aren’t designed to conquer. This comprehensive guide will equip you with the expert knowledge and practical solutions needed to securely install your LED strip lights, ensuring they stay put and shine brightly for years to come.
Understanding the Challenge: Why LED Strips Struggle on Textured Walls
The primary reason LED strip lights often fail to adhere to textured walls lies in the fundamental nature of adhesion. The adhesive pre-applied to most LED strips is formulated for smooth, non-porous surfaces. When applied to a textured wall, the adhesive can only make contact with the tiny “peaks” of the texture, leaving significant “valleys” uncovered. This drastically reduces the available surface area for bonding—sometimes by as much as 70%—creating a weak connection that is easily compromised by gravity and even minor environmental shifts.
Beyond the surface area deficit, textured walls are also prone to accumulating dust, dirt, and microscopic debris within their crevices. These contaminants act as a barrier, further preventing a clean and strong bond between the adhesive and the wall. Moreover, factors like temperature fluctuations and humidity can weaken the adhesive over time, causing it to soften, lose its grip, or become brittle, ultimately leading to your LED strips peeling away. It’s a battle of physics and surface dynamics that requires a more strategic approach than simply pressing and hoping.
Essential Wall Preparation for Optimal Adhesion
Proper wall preparation is the bedrock of any successful LED strip installation, especially on textured surfaces. Skipping this crucial step is one of the most common reasons strips fail to stick.
First, thoroughly clean the surface where the LED strips will be installed. Use rubbing alcohol (isopropyl alcohol) or a mild detergent mixed with water to wipe down the wall. This removes grease, dust, and other impurities that can sabotage adhesion. Avoid regular household cleaners that may leave a residue. After cleaning, allow the wall surface to dry completely for several minutes. Any residual moisture will severely hinder the adhesive’s effectiveness.
Next, smooth out significant bumps or flaking paint if present. While you won’t eliminate the texture entirely, gently sanding down any pronounced irregularities with fine-grit sandpaper can provide a slightly more uniform surface for the adhesive to grab onto. Always wipe away any sanding dust afterward.
Finally, consider the environmental conditions. Adhesives perform best within a specific temperature range, typically between 60°F and 80°F (15°C to 27°C). Installing your LED strips on a cool, dry day will yield better results than on a hot, humid one. Before committing to the full installation, it’s wise to test the adhesive in a small, inconspicuous area to ensure it sticks well without damaging the paint upon potential removal.
Non-Drilling Methods for Textured Surfaces
For those who prefer not to drill into their walls, perhaps due to rental agreements or a desire for flexibility, several non-drilling methods offer improved adhesion on textured surfaces.
Upgrading Your Adhesive
The most direct approach is to replace or supplement the LED strip’s weaker pre-applied adhesive with a stronger, more conforming option.
- 3M VHB (Very High Bond) Tape: This specialized double-sided foam tape is a top recommendation for its superior strength and durability. Its unique foam core allows it to conform slightly to uneven textures, maximizing contact points where standard tape fails. While incredibly effective, be aware that 3M VHB tape creates a very strong, often permanent bond, and removal may pull paint or even drywall paper.
- Heavy-Duty Double-Sided Foam Tape: Similar to 3M VHB, high-quality double-sided foam tapes can provide cushioning and fill small gaps, making them excellent for bonding to irregular surfaces. Look for tapes specifically designed for mounting or outdoor use, as these typically have stronger adhesives and better weather resistance.
- Heat-Resistant Installation Putty: Certain types of installation putty, particularly those designed to be heat-resistant, can offer a temporary yet secure hold. These putties can be molded to fill the texture, creating a better bonding surface. However, they are generally best for lighter strips or shorter runs.
|
Our Picks for the Best LED strip light in 2026
As an Amazon Associate I earn from qualifying purchases.
|
||
| Num | Product | Action |
|---|---|---|
| 1 | dalattin White LED Strip Lights, 20ft Dimmable Super Bright 24V Led Tape Light 6500K 360 LEDs Lights for Bedrooms, Mirror, Kitchen, Home Decoration Daylight White |

|
| 2 | Barrina (6 Pack LED T5 Integrated Single Fixture, 4FT, 2200lm, 6500K Super Bright White, 20W Utility LED Shop Light, Ceiling and Under Cabinet Light, Corded Electric with ON/Off Switch, ETL Listed |
|
| 3 | Govee White LED Strip Lights, Upgraded 16.4ft Dimmable LED Light Strip 6500K Bright Daylight White, Strong Adhesive, 300 LEDs Flexible Tape Lights for Mirror, Kitchen Cabinet, Bedroom, Christmas Decor |
|
| 4 | Govee RGBIC LED Strip Lights, Smart LED Lights for Bedroom, Bluetooth LED Lights APP Control, DIY Multiple Colors on One Line, Color Changing LED Strip Lighting Music Sync, Home Decor, 16.4ft |
|
| 5 | White Led Strip Lights for Bedroom Small Dimmable LED Lights Strip 16.4ft Super Bright Flexible LED Tape Lights Rope Light for for Room Home Decor Luces Leds for Living Room Kitchen Vanity Mirror |
|
| 6 | DAYBETTER Led Strip Lights 32.8ft Kit with Remote and Power Supply Color Changing |
|
| 7 | KSIPZE 100ft Led Strip Lights RGB Music Sync Color Changing Led Lights with Smart App Control Remote Led Lights for Bedroom Room Lighting Flexible Home Décor |
|
| 8 | DAYBETTER LED Strip Lights 110ft, Smart Lighting Strips with App Remote Control, RGB Music Sync Color Changing Lights for Bedroom Kitchen Party Home Decor Luces led para cuarto (1 Roll) |
|
| 9 | NBBUFF Led Lights for Bedroom 50ft (1 Roll), Color Changing RGB Led Strip Lights with 60 Keys Remote and App Control, Music Sync Led Lights for Room Kitchen Party Home Decor |
|
| 10 | Govee 100ft RGBIC LED Strip Lights, Smart LED Lights Work with Alexa and Google Assistant, LED Lights for Bedroom WiFi App Control Segmented DIY Multiple Colors, Color Changing Light, (2 x 50ft) |
|
When applying these tapes, cut them to fit the width of your LED strip and apply them along the entire length, pressing firmly for at least 30 seconds to ensure good initial contact.
Reinforcement Techniques
Even with stronger adhesives, additional support can prevent sagging and ensure long-term stability.
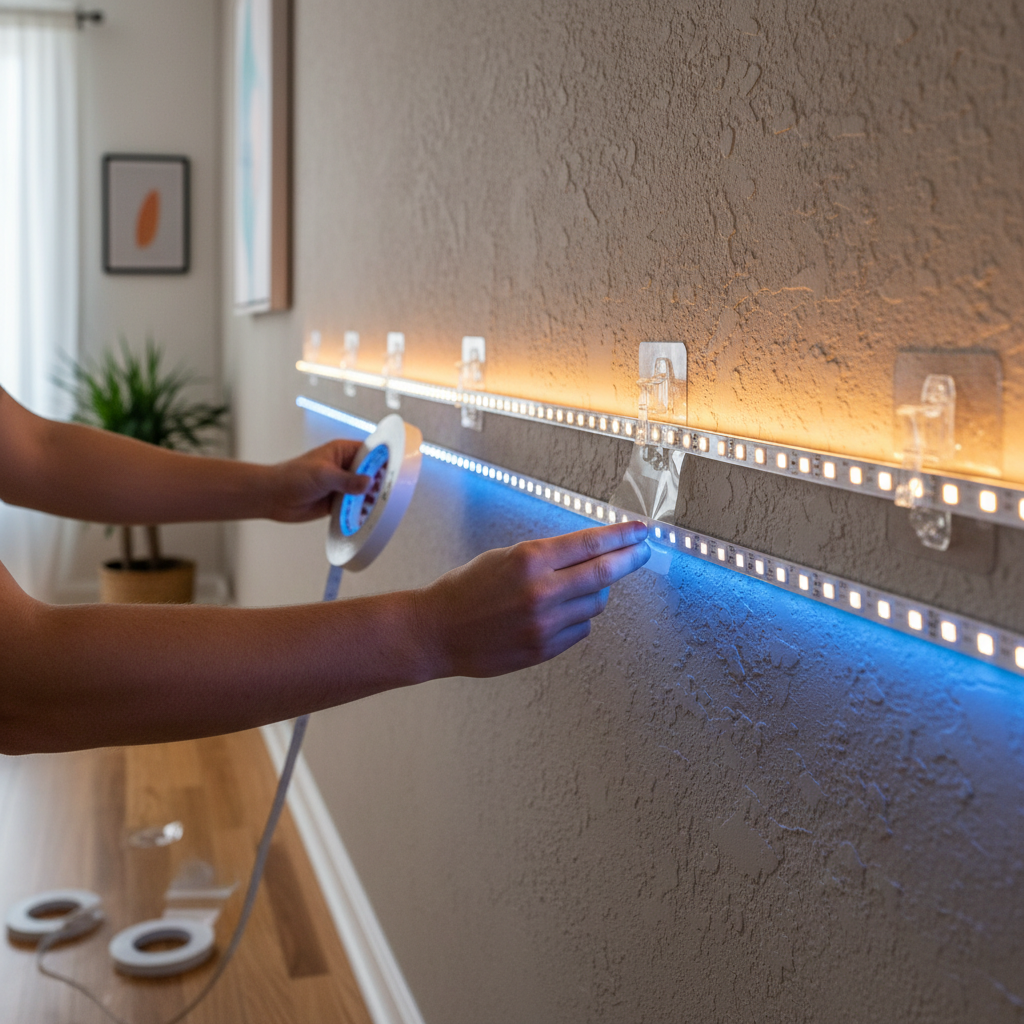
- Mounting Clips: Small, clear mounting clips are an excellent way to reinforce LED strips. These clips typically come with their own adhesive backing, but for textured walls, consider using a small screw or a dab of a strong construction adhesive with the clip for extra security, if drilling is an option. Space them strategically along the strip, especially at corners and where strips meet.
- Additional Foam Mounting Tape at Intervals: For longer LED strip runs, strategically placing extra pieces of foam mounting tape every few feet can provide critical support and prevent the strip from pulling away from the wall over time.
- Paint Tape as a Buffer (for Renters): If paint damage is a major concern, particularly for renters, you can try applying a layer of painter’s tape to the wall first, then adhering the LED strip (or a stronger adhesive tape) to the painter’s tape. This acts as a buffer, making removal much gentler on the original paint, though it may slightly reduce the overall bond strength.
The Professional Solution: Aluminum LED Channels
For the most professional, durable, and aesthetically pleasing installation on textured walls, aluminum LED channels (also known as LED profiles or extrusions) are the undisputed champions. This method involves a bit more effort, as it typically requires drilling, but the results are unmatched.
Aluminum channels provide a perfectly smooth, flat surface for your LED strips to adhere to, completely bypassing the issues of wall texture. These channels are typically mounted to the wall using small screws and tiny mounting clips. Once the channel is securely fastened, the LED strip simply sticks inside it.
Beyond providing a stable mounting surface, aluminum channels offer several significant advantages:
- Superior Aesthetics: They create a clean, finished look, hiding the individual LED dots and diffusing the light for a more uniform glow.
- Protection: The channels protect the LED strips from dust, moisture, and physical damage, extending their lifespan.
- Heat Dissipation: Aluminum is an excellent heat conductor, which helps dissipate heat generated by the LEDs, further prolonging the life of your strip lights.
- Versatility: Available in various shapes and sizes (e.g., corner profiles, recessed profiles), they can be used for diverse lighting designs and installations.
Installation Steps for Aluminum Channels:
- Measure and Cut: Measure your desired run and cut the aluminum channel to length using a hacksaw or miter saw.
- Mount Clips: Position the mounting clips along your desired path on the wall, marking the drill points. Drill pilot holes and secure the clips with small screws.
- Attach Channel: Snap the aluminum channel into the secured mounting clips.
- Install LED Strip: Peel the backing from your LED strip and firmly press it into the channel.
- Add Diffuser: Snap the diffuser cover onto the channel for a clean, diffused light effect.
Common Installation Mistakes to Avoid
Even with the right materials, common errors can undermine your efforts.
- Not Cleaning the Surface: As highlighted, this is the biggest culprit behind failed adhesion. A dirty surface means a weak bond.
- Relying Solely on Weak Pre-Applied Adhesive: For textured walls, the adhesive that comes with the strip is often insufficient. Always plan for an upgraded adhesive or a mounting solution.
- Ignoring Wall Texture: Trying to force a flat adhesive onto a bumpy surface without a conforming material or a smooth channel will inevitably lead to failure.
- Improper Corner Installation: Bending LED strips sharply at corners creates tension points where the adhesive is most likely to peel. Use flexible corner connectors, cut the strip and use solderless connectors, or ensure your mounting solution (like an aluminum channel) accommodates neat corner turns.
- Rushing the Process: Good adhesion takes time and patience. Ensure proper drying times after cleaning and press firmly for the recommended duration when applying tape. Avoid tampering with the strips for several hours after installation to allow the adhesive to cure.
Maintaining Your LED Strip Installation & Safe Removal
Once your LED strips are securely in place, a little maintenance can ensure their longevity. Periodically check along the strip for any signs of loosening, especially in high-traffic areas or corners, and reapply adhesive or reinforcement if necessary. Keep the area around your LED strips clean to prevent dust buildup, which can sometimes affect the long-term integrity of the adhesive or the strip itself.
When it comes time to remove your LED strips, especially those installed with stronger adhesives, proceed with caution to minimize wall damage. For tapes like 3M VHB, gently warming the adhesive with a hairdryer on a low setting can soften the bond, making it easier to peel away slowly. Always pull the strip at a shallow angle, close to the wall, rather than straight out. Even with care, strong adhesives may still remove some paint or drywall paper, so be prepared for minor touch-ups. If you used mounting clips with screws, simply unscrew the clips and gently remove them.
“The key to successful LED strip installation on textured walls isn’t fighting the texture, but smartly circumventing it. Proper preparation and selecting the right mounting method for your specific wall type are non-negotiable for a lasting result.” – Alex Chen, LED Lighting Expert
Conclusion
Installing LED strip lights on textured walls doesn’t have to be a source of frustration. By understanding why standard adhesives fall short and employing the right techniques and materials, you can achieve a professional and lasting lighting installation. Whether you opt for the enhanced grip of specialized foam tapes and mounting clips or embrace the permanence and sleek aesthetics of aluminum channels, the effort put into proper preparation and application will pay dividends in the form of beautifully illuminated spaces. Don’t let textured walls dim your lighting aspirations; empower your projects with secure, vibrant LED strip lighting.
Frequently Asked Questions
What is the best type of adhesive for LED strip lights on textured walls?
For non-drilling solutions, high-quality double-sided foam tape like 3M VHB (Very High Bond) tape is highly recommended. Its foam core can conform to the texture, creating a stronger bond than standard adhesives.
How do I prepare a textured wall before installing LED strips?
Begin by thoroughly cleaning the wall with rubbing alcohol or a mild detergent to remove dust, oil, and grime. Ensure the surface is completely dry before applying any adhesive. Lightly sanding any prominent bumps can also improve adhesion.
Can I use super glue or hot glue for LED strips on textured walls?
It is generally not recommended to use super glue or hot glue. Super glue can be brittle and difficult to remove without damaging the wall, while hot glue might not provide a sufficiently strong or permanent bond and can look messy. Specialized foam tapes or mounting channels are superior alternatives.
How can I make my LED strips stay on textured walls without drilling?
To avoid drilling, focus on advanced adhesive solutions like 3M VHB tape or robust double-sided foam tape. Supplement these with adhesive-backed mounting clips placed at regular intervals, especially in corners, to provide additional support.
Are LED strip lights a fire hazard if they fall off the wall?
High-quality, UL-listed LED strip lights pose a very low fire risk. The greater risk generally comes from faulty wiring, overloaded power supplies, or covering the strips with flammable materials that prevent proper heat dissipation, regardless of whether they are securely mounted or not.