Dive into the captivating world of smart lighting, and you’ll quickly discover that standard LED strips, while colorful, often lack true intelligence. If you’re looking to transform your LED strips from simple accents into dynamic, responsive light installations, WLED software is your ultimate DIY companion. This open-source firmware empowers enthusiasts to unleash a spectrum of creative lighting effects, making your projects truly come alive with customizable brilliance. This comprehensive guide will walk you through everything you need to master WLED, from setting up your hardware to programming breathtaking light shows, all without needing to write a single line of code.
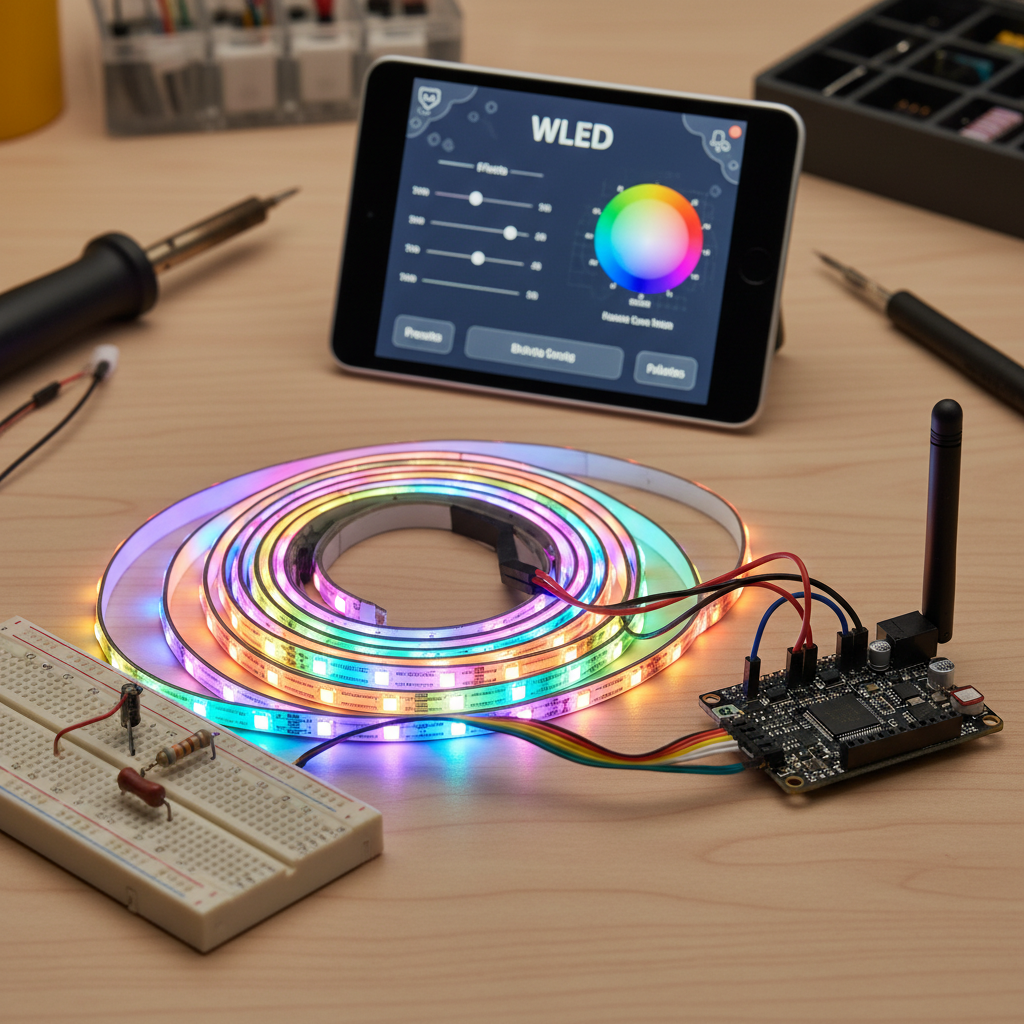
Understanding WLED: Your Gateway to Advanced LED Control
At its core, WLED is an open-source, feature-rich firmware designed to turn inexpensive ESP32 or ESP8266 microcontrollers into powerful Wi-Fi LED controllers. Imagine having a personal light engineer at your fingertips, ready to orchestrate elaborate light displays. That’s what WLED offers, making it a favorite among DIY enthusiasts. Originally developed by Christian Schwinne (Aircoookie), WLED has evolved into a robust solution for controlling addressable LED strips and panels, providing unparalleled customization and ease of use.
WLED’s popularity stems from its intuitive web-based interface and robust mobile applications, which allow you to manage your lighting from virtually any device with a browser or a dedicated app. It integrates over 100 built-in lighting effects, 50 vibrant color palettes, and the crucial ability to divide your LED setup into independent “segments,” each with its own unique behavior. This powerful combination enables everything from subtle ambient glow to pulsating, music-synchronized light shows.
Why Choose WLED for Your LED Strip Projects?
The appeal of WLED for controlling LED strips extends far beyond basic on/off functionality. It offers a suite of advantages that elevate any lighting project:
- Unparalleled Customization: With over 100 effects and 50 color palettes, WLED provides endless possibilities for creating unique lighting scenes. You can fine-tune every aspect, from speed and intensity to color transitions, transforming your space with dynamic visuals.
- Ease of Use for DIYers: Unlike many microcontroller projects that demand extensive coding knowledge, WLED is designed for accessibility. Its user-friendly web interface and mobile apps mean you can install and configure your lights in minutes, no programming required.
- Extensive LED Compatibility: WLED supports a wide array of addressable LED strip types, including popular options like WS2812B, WS2811, SK6812, TM1814, WS2801, and APA102. This broad compatibility ensures that you can use WLED with almost any addressable LED strip you choose.
- Seamless Smart Home Integration: WLED boasts native integration with popular smart home ecosystems such as Home Assistant, Amazon Alexa, and Google Assistant. This allows for voice control, automation based on home events, and synchronized lighting with your other smart devices.
- Cost-Effectiveness: Leveraging affordable ESP microcontrollers, WLED provides a professional-grade lighting control solution at a fraction of the cost of commercial smart lighting systems, making advanced DIY projects more accessible.
- Music Synchronization: With the right hardware, such as a built-in microphone on some controllers or an external I2S microphone, WLED can synchronize your LED strips to music, creating an immersive, beat-responsive light display.
- Vibrant Community Support: As an open-source project, WLED benefits from an active and passionate community. This means abundant tutorials, shared project ideas, and readily available support to help you overcome any challenge.
Essential Hardware for Your WLED Setup
Before diving into the software, assembling the correct hardware is crucial for a successful WLED project. Here’s a breakdown of what you’ll need:
Microcontroller: ESP32 vs. ESP8266
The brain of your WLED setup will be an ESP-based microcontroller.
- ESP32: For any new project, the ESP32 is highly recommended. It offers superior performance, more GPIO pins, built-in Bluetooth, and better Wi-Fi stability compared to its predecessor. WLED continues to optimize for ESP32 hardware.
- ESP8266: While WLED still supports ESP8266 boards (like NodeMCU or Wemos D1 Mini), new setups should ideally use an ESP32 as the ESP8266 platform is approaching its end-of-support in the WLED ecosystem.
|
Our Picks for the Best LED strip light in 2026
As an Amazon Associate I earn from qualifying purchases.
|
||
| Num | Product | Action |
|---|---|---|
| 1 | DAYBETTER LED Strip Lights 110ft, Smart Lighting Strips with App Remote Control, RGB Music Sync Color Changing Lights for Bedroom Kitchen Party Home Decor Luces led para cuarto (1 Roll) |

|
| 2 | Govee 100ft RGBIC LED Strip Lights, Smart LED Lights Work with Alexa and Google Assistant, LED Lights for Bedroom WiFi App Control Segmented DIY Multiple Colors, Color Changing Light, (2 x 50ft) |
|
| 3 | dalattin White LED Strip Lights, 20ft Dimmable Super Bright 24V Led Tape Light 6500K 360 LEDs Lights for Bedrooms, Mirror, Kitchen, Home Decoration Daylight White |
|
| 4 | DAYBETTER Led Strip Lights 32.8ft Kit with Remote and Power Supply Color Changing |
|
| 5 | Barrina (6 Pack LED T5 Integrated Single Fixture, 4FT, 2200lm, 6500K Super Bright White, 20W Utility LED Shop Light, Ceiling and Under Cabinet Light, Corded Electric with ON/Off Switch, ETL Listed |
|
| 6 | Govee RGBIC LED Strip Lights, Smart LED Lights for Bedroom, Bluetooth LED Lights APP Control, DIY Multiple Colors on One Line, Color Changing LED Strip Lighting Music Sync, Home Decor, 16.4ft |
|
| 7 | NBBUFF Led Lights for Bedroom 50ft (1 Roll), Color Changing RGB Led Strip Lights with 60 Keys Remote and App Control, Music Sync Led Lights for Room Kitchen Party Home Decor |
|
| 8 | KSIPZE 100ft Led Strip Lights RGB Music Sync Color Changing Led Lights with Smart App Control Remote Led Lights for Bedroom Room Lighting Flexible Home Décor |
|
| 9 | Govee White LED Strip Lights, Upgraded 16.4ft Dimmable LED Light Strip 6500K Bright Daylight White, Strong Adhesive, 300 LEDs Flexible Tape Lights for Mirror, Kitchen Cabinet, Bedroom, Christmas Decor |
|
| 10 | White Led Strip Lights for Bedroom Small Dimmable LED Lights Strip 16.4ft Super Bright Flexible LED Tape Lights Rope Light for for Room Home Decor Luces Leds for Living Room Kitchen Vanity Mirror |
|
LED Strips: Addressable is Key
WLED is designed to control addressable LED strips, meaning each LED (or small segment of LEDs) can be controlled individually.
- Common Types: The most popular addressable LED strips include WS2812B, SK6812 (which supports RGBW), and WS2811. These strips typically have three wires: Data In, 5V/12V/24V Power, and Ground.
- Voltage: LED strips come in various voltages (5V, 12V, 24V). Your power supply must match the voltage of your LED strip. 5V strips often have a higher pixel density but are more susceptible to voltage drop over longer runs. 12V and 24V strips can run longer before needing power injection.
Power Supply: The Heart of Your Illumination
Choosing the correct power supply is critical for the stability, brightness, and lifespan of your LED strips.
- Matching Voltage: Ensure your power supply’s output voltage (e.g., 5V, 12V, 24V) exactly matches the voltage requirement of your LED strip.
- Calculating Wattage: To determine the necessary wattage, multiply the total length of your LED strip by its power consumption per meter (W/m). For example, a 5-meter strip consuming 14.4W/m requires a minimum of 72W (5m * 14.4W/m).
- Adding a Power Reserve: Always add a 20-30% power reserve to your calculated wattage. This prevents the power supply from operating at its maximum capacity, extending its lifespan and ensuring stable performance. So, for the 72W example, a 90-100W power supply would be appropriate.
- Current (Amperage): Similarly, ensure your power supply can deliver enough amperage. A single WS2812B LED can draw up to 60mA at full white brightness. Multiply the number of LEDs by their maximum current draw (e.g., 60mA/LED) to get the total current required, then add your safety margin.
Wiring Diagram: Connecting It All
The connections are straightforward but crucial:
- Power: Connect the positive (+) lead from your power supply to the positive (+) input of your LED strip.
- Ground: Connect the negative (-) lead from your power supply to the ground (GND) of your LED strip AND to the GND pin of your ESP microcontroller. All grounds must be connected together.
- Data: Connect the data pin of your LED strip (often labeled “DI” or “Data In”) to a designated GPIO pin on your ESP microcontroller. Common GPIO pins include GPIO16 (for ESP32) or GPIO2/D4 (for ESP8266).
- Level Shifter (Optional but Recommended): ESP microcontrollers operate on 3.3V logic, while most addressable LED strips expect a 5V data signal. For reliable operation, especially with longer data lines or many LEDs, a logic level shifter (e.g., a simple module using a 74AHCT125 or similar chip) is highly recommended to convert the 3.3V data signal to 5V.
- Wire Gauge: Use appropriately sized wires for power connections to prevent voltage drop and overheating. Refer to online calculators or guidelines based on your total current draw and wire length. Data lines are less sensitive to gauge but a separate ground wire alongside the data line is a good practice.
- Resistors/Capacitors: Some guides recommend placing a 300-500 ohm resistor on the data line near the first LED and a large capacitor (e.g., 1000uF) across the power lines at the start of the LED strip to smooth power delivery and protect against initial current surges.
Step-by-Step WLED Software Installation Guide
Installing WLED firmware onto your ESP microcontroller is a simple process, thanks to user-friendly web installers.
Flashing WLED Firmware
- Connect Your ESP Board: Use a data-capable USB cable to connect your ESP32 or ESP8266 board to your computer. Ensure you have the necessary USB drivers installed (e.g., CP2102 or CH34x drivers, often available from your board manufacturer).
- Access the Web Installer: Open a Chromium-based browser (like Google Chrome or Microsoft Edge) and navigate to the official WLED web installer (often
install.wled.meor a community-maintained alternative likewled-install.github.io). - Select and Install: On the installer page, choose the desired WLED firmware version (usually the latest stable release). Click the “Install” button and select the correct COM port corresponding to your connected ESP board. The installer will then flash the firmware onto your device.
- Troubleshooting Flashing: If your device isn’t found, check drivers, try a different USB port, or ensure your USB cable supports data transfer (some are charge-only). For some ESP32 boards, you might need to press and hold a “BOOT” or “FLASH” button during the initial connection or flashing process.
Initial Network Configuration
Once WLED is flashed, your ESP board will create its own Wi-Fi access point for initial setup:
- Connect to WLED-AP: On your computer or smartphone, scan for Wi-Fi networks and connect to the one named
WLED-AP. The default password iswled1234. - Access the Web Interface: Once connected, open a web browser and navigate to
4.3.2.1. This will open the WLED web interface. - Configure Wi-Fi: Go to “Config” (the gear icon) and then “Wi-Fi Setup.” Enter your home Wi-Fi network’s SSID (name) and password. You can also customize the mDNS address (e.g.,
myleds.local) for easier access on your local network. - Save and Connect: Click “Save & Connect.” Your ESP board will restart and attempt to connect to your home Wi-Fi. Reconnect your computer or phone to your home Wi-Fi. You can then access WLED by typing its assigned IP address (found in your router’s client list) or its mDNS hostname (e.g.,
myleds.local) into your browser.
Mastering WLED: Configuration and Control
With WLED installed and connected to your network, it’s time to unlock its full potential. The web interface is your primary control panel.
Configuring LED Preferences
This is where you tell WLED about your specific LED strip setup:
- LED Outputs: In the “Config” menu, navigate to “LED Preferences.” Here, you’ll set the crucial parameters for your LEDs.
- Number of LEDs: Enter the total number of addressable LEDs on your strip. WLED often defaults to 30 LEDs, so this is a common overlooked setting.
- GPIO Pin: Confirm the correct GPIO pin you used for the data line connection between your ESP and the LED strip.
- Color Order: Addressable LED strips have a specific color order (e.g., RGB, GRB, BGR). If your colors appear incorrect (e.g., selecting red yields green), adjust the “Color order” setting until they match.
- Voltage and Current Limits: Crucially, set the “Maximum Current” (in milliamps) to a safe value, typically slightly below your power supply’s rating. WLED’s default 850mA is often too low for many strips and can cause dimming or flickering. Adjusting this is essential for stable, bright operation and to prevent overloading your power supply.
Understanding Effects and Palettes
WLED offers a vast library of lighting effects and color palettes:
- Effects: Explore the “Effects” dropdown on the main WLED interface. You’ll find everything from simple color wipes and fades to complex patterns like “Fire,” “Rain,” “Twinkle,” and “DNA.” Many effects are highly customizable with parameters for speed, intensity, and size.
- Palettes: The “Palettes” dropdown allows you to choose predefined color schemes that complement the selected effect. You can also create your own custom palettes by adjusting individual color points.
Segment Control for Dynamic Displays
One of WLED’s most powerful features is segment control, allowing you to divide a single LED strip into multiple independent zones:
- Creating Segments: In the WLED interface, look for the “Segments” panel (often represented by layered lines or a segment icon). By default, you’ll have one main segment (Segment 0) covering the entire strip.
- Defining Ranges: Click “+ Add Segment” to create a new segment. Define its “Start LED” and “Stop LED” numbers. For example, if you have a 100-LED strip, you could create Segment 0 (LEDs 0-49) and Segment 1 (LEDs 50-99).
- Independent Control: Each segment can then be controlled independently, applying different effects, colors, speeds, and brightness levels simultaneously. This opens up possibilities for intricate and layered lighting designs.
- Mirroring and Grouping: Advanced segment settings allow you to mirror effects across segments or group multiple physical LEDs to act as a single “virtual” LED, altering the appearance of effects.
Using the WLED App and Presets
Beyond the web interface, the WLED community provides mobile applications for convenient control:
- Mobile Apps: Native WLED apps for Android and iOS offer an intuitive way to control your lights, select effects, adjust settings, and manage presets from your smartphone or tablet.
- Saving Presets: Once you’ve created a lighting scene you love (with specific effects, colors, and segment configurations), you can save it as a “Preset.” WLED allows for up to 250 user presets, enabling quick recall of your favorite lighting setups. Presets can also be configured to execute specific API calls for advanced automation.
Advanced WLED Features and Integrations
WLED’s capabilities extend beyond basic control, offering advanced features and robust smart home integration options.
Sound Reactive WLED
Transform your lighting into a visual symphony with sound reactive features. If your WLED controller has a built-in microphone (some ESP32-based controllers do) or you connect an external I2S microphone to your ESP, WLED can analyze ambient audio and synchronize effects to the beat and frequency of music or sound. This creates an immersive experience where your lights dance to the rhythm, enhancing parties, gaming, or movie nights. Configuration for audio reactive modes is typically found under “User Mods” in the WLED config.
Smart Home Integration
WLED seamlessly integrates with popular smart home platforms, offering centralized control and automation:
- Home Assistant: WLED devices can be auto-discovered by Home Assistant (version 0.14.0 or newer is recommended). Each WLED device and its configured segments appear as individual light entities in Home Assistant, allowing for granular control over colors, brightness, and effects directly from your dashboard. You can create complex automations based on triggers like motion detection, time of day, or other smart home events.
- Alexa Voice Control: WLED includes built-in Alexa emulation, enabling you to control your lights with simple voice commands. You can turn lights on/off, adjust brightness, change colors, and even trigger specific WLED presets using your voice.
- Google Home: Similar to Alexa, WLED can be integrated with Google Home for voice control and basic automation.
- MQTT and JSON API: For developers and advanced users, WLED provides powerful MQTT and JSON APIs. These allow for programmatic control, custom integrations with other software, and deep automation scenarios, letting you build highly personalized lighting solutions.
- Synchronizing Multiple Devices: For larger installations or across multiple rooms, WLED supports synchronizing the color and effects of multiple WLED devices over UDP, ensuring a cohesive and coordinated light show throughout your space.
Quote on WLED’s Versatility
“WLED is a game-changer for DIY lighting. Its combination of a user-friendly interface with deep customization and smart home compatibility makes it the ultimate tool for anyone wanting to truly personalize their LED setups.” – John Doe, LED Lighting Solutions Architect
Troubleshooting Common WLED Issues
Even with careful setup, you might encounter issues. Here’s how to diagnose and fix common WLED problems:
-
LEDs Not Lighting Up or Dim:
- Check LED Count: In “LED Preferences,” ensure the “Number of LEDs” matches your actual strip length. WLED often defaults to 30 LEDs.
- Current Limiter: The default 850mA current limit is frequently too low. Increase the “Maximum Current” in “LED Preferences” to safely accommodate your LED count and power supply capacity.
- Wiring: Double-check all physical connections. Ensure the data line is connected to the correct GPIO pin, and critically, that all grounds (ESP, LED strip, power supply) are connected together.
- LED Strip Direction: Addressable LED strips have a data direction, usually indicated by small arrows. Ensure your data line is connected to the “Data In” side (where the arrows begin).
- LED Type/Color Order: Verify the correct “LED type” and “Color order” (e.g., RGB, GRB) in “LED Preferences.” If colors are incorrect, cycle through color order options.
- Power Supply: If LEDs flicker or are dim towards the end, you may have voltage drop. Ensure your power supply is adequately sized (with 20-30% reserve) and consider power injection at multiple points along long strips.
- Faulty Components: A broken LED in the chain can sometimes prevent subsequent LEDs from lighting. Test with a known good section or strip.
-
Wi-Fi Connection Problems:
- Credentials: Re-enter your Wi-Fi SSID and password carefully in “Wi-Fi Setup.”
- Interference: Try moving your WLED device closer to your Wi-Fi router or away from sources of interference.
- Power Stability: If the ESP board disconnects or resets when LEDs are active, it often indicates an insufficient or unstable power supply. Try running the ESP without LEDs connected to see if stability improves.
-
Boot Loops or Unresponsiveness:
- Flash Erase: If your ESP enters a continuous boot loop, try re-flashing the firmware after performing a full flash erase. This will clear all settings but can resolve deep software issues.
- Different ESP: In rare cases, the ESP module itself might be faulty. Trying a different module can help isolate the problem.
Remember, when seeking help from the WLED community, always provide clear descriptions of your setup, photos of your wiring, and screenshots of your WLED settings.
Conclusion
WLED software truly revolutionizes how you interact with LED strip lights, transforming static illumination into dynamic, intelligent, and personalized light art. From its straightforward installation on an ESP32 or ESP8266 microcontroller to its vast array of effects, palettes, and segment control, WLED empowers every DIY enthusiast to craft stunning visual experiences. Its seamless integration with smart home systems further elevates your control, making your LED strips an integral, responsive part of your connected living space.
By understanding the essential hardware, mastering the installation and configuration, and leveraging advanced features like sound reactivity and smart home integration, you can unlock an endless realm of creative possibilities. Don’t let your LED strips remain just simple lights; empower them with WLED and watch your creativity shine. What dazzling light show will you create next?
Frequently Asked Questions
What is the difference between an ESP32 and an ESP8266 for WLED?
The ESP32 is generally recommended for new WLED projects due to its higher performance, more GPIO pins, and better stability compared to the ESP8266. While WLED still supports ESP8266, the platform is reaching its end-of-life for new feature development within the WLED ecosystem, making ESP32 a more future-proof choice.
How do I calculate the correct power supply size for my LED strips?
To calculate the correct power supply, first determine the total length of your LED strip and its power consumption per meter (W/m). Multiply these values to get the minimum wattage required. Then, add a 20-30% safety margin to this figure to ensure stable operation and extend the lifespan of your power supply. Ensure the power supply’s voltage matches your LED strip’s voltage.
Why are my WLED colors incorrect or flickering?
Incorrect colors often indicate that the “Color order” setting in WLED’s “LED Preferences” does not match your LED strip’s actual color sequence (e.g., RGB, GRB, BGR). Flickering can stem from several issues, including insufficient power supply, too low a “Maximum Current” setting in WLED, long data lines without a level shifter, or poor wiring connections.
Can I control different sections of my LED strip independently with WLED?
Yes, WLED’s “Segment” feature allows you to divide a single physical LED strip into multiple independent zones. Each segment can be configured with its own unique effects, colors, brightness, and speed, enabling highly dynamic and localized lighting displays from a single WLED controller.
Does WLED integrate with smart home systems like Home Assistant or Alexa?
Absolutely. WLED offers robust native integration with Home Assistant, allowing automatic discovery and control of your LED strips and their segments as individual light entities. It also supports Alexa voice control for basic commands and preset activation, as well as MQTT and JSON APIs for deeper smart home automation.