Transforming your kitchen’s ambiance and functionality can be simpler than you think. Under cabinet lighting is a powerful yet often overlooked element that not only brightens your workspace but also adds a sophisticated touch to your home. Whether you’re a seasoned DIY enthusiast or just starting your home improvement journey, installing under cabinet lights is a rewarding project that can significantly enhance your kitchen’s appeal. This comprehensive tutorial will walk you through everything you need to know, from selecting the perfect lighting type to a step-by-step installation process, ensuring you achieve a flawless, professional finish.
Understanding Under Cabinet Lighting: Types and Benefits
Under cabinet lighting serves a dual purpose: it provides essential task lighting for cooking and preparation, and it creates a warm, inviting atmosphere through accent or ambient illumination. It effectively eliminates shadows cast by overhead fixtures, making daily kitchen activities safer and more enjoyable.
Popular Types of Under Cabinet Lighting
The market offers a variety of under cabinet lighting options, each with unique characteristics suitable for different needs and aesthetics.
- LED Strip Lights: These flexible, adhesive-backed strips are incredibly versatile and popular for DIY projects. They offer continuous, even light distribution and are highly energy-efficient and long-lasting. Available in various lengths, colors, and brightness levels, LED strips can be cut to size, making them ideal for custom installations.
- Puck Lights: Small, circular lights that provide focused pools of illumination. Puck lights are excellent for highlighting specific areas, such as a cutting board or decorative items within a glass cabinet. They can be surface-mounted or recessed for a cleaner look.
- Light Bars: Often pre-assembled in rigid housing, light bars provide a more structured linear lighting solution. They are typically available in various lengths and can be linked together to cover larger areas. Many come with built-in diffusers for a softer glow.
- Tape Lights and Rope Lights: Similar to LED strips, tape lights are thin and flexible, while rope lights encase small bulbs in a durable, clear plastic tube, offering a softer, more diffuse light. While tape lights are suitable for under cabinet use, rope lights are often chosen for ambient lighting along toe kicks or coves.
|
Our Picks for the Best LED strip light in 2026
As an Amazon Associate I earn from qualifying purchases.
|
||
| Num | Product | Action |
|---|---|---|
| 1 | NBBUFF Led Lights for Bedroom 50ft (1 Roll), Color Changing RGB Led Strip Lights with 60 Keys Remote and App Control, Music Sync Led Lights for Room Kitchen Party Home Decor |

|
| 2 | KSIPZE 100ft Led Strip Lights RGB Music Sync Color Changing Led Lights with Smart App Control Remote Led Lights for Bedroom Room Lighting Flexible Home Décor |
|
| 3 | White Led Strip Lights for Bedroom Small Dimmable LED Lights Strip 16.4ft Super Bright Flexible LED Tape Lights Rope Light for for Room Home Decor Luces Leds for Living Room Kitchen Vanity Mirror |
|
| 4 | dalattin White LED Strip Lights, 20ft Dimmable Super Bright 24V Led Tape Light 6500K 360 LEDs Lights for Bedrooms, Mirror, Kitchen, Home Decoration Daylight White |
|
| 5 | Barrina (6 Pack LED T5 Integrated Single Fixture, 4FT, 2200lm, 6500K Super Bright White, 20W Utility LED Shop Light, Ceiling and Under Cabinet Light, Corded Electric with ON/Off Switch, ETL Listed |
|
| 6 | DAYBETTER LED Strip Lights 110ft, Smart Lighting Strips with App Remote Control, RGB Music Sync Color Changing Lights for Bedroom Kitchen Party Home Decor Luces led para cuarto (1 Roll) |
|
| 7 | Govee 100ft RGBIC LED Strip Lights, Smart LED Lights Work with Alexa and Google Assistant, LED Lights for Bedroom WiFi App Control Segmented DIY Multiple Colors, Color Changing Light, (2 x 50ft) |
|
| 8 | DAYBETTER Led Strip Lights 32.8ft Kit with Remote and Power Supply Color Changing |
|
| 9 | Govee RGBIC LED Strip Lights, Smart LED Lights for Bedroom, Bluetooth LED Lights APP Control, DIY Multiple Colors on One Line, Color Changing LED Strip Lighting Music Sync, Home Decor, 16.4ft |
|
| 10 | Govee White LED Strip Lights, Upgraded 16.4ft Dimmable LED Light Strip 6500K Bright Daylight White, Strong Adhesive, 300 LEDs Flexible Tape Lights for Mirror, Kitchen Cabinet, Bedroom, Christmas Decor |
|
The Advantages of Illuminating Your Undercabinet Space
Investing in under cabinet lighting brings a multitude of benefits to your home:
- Enhanced Visibility and Safety: By directing light directly onto your countertops, under cabinet fixtures brighten work surfaces, making tasks like chopping and reading recipes easier and safer. This eliminates common shadows caused by overhead lighting.
- Aesthetic Appeal: These lights can dramatically elevate the visual appeal of your kitchen. They highlight backsplashes, granite countertops, and other design elements, creating a polished, high-end look.
- Energy Efficiency: Modern under cabinet lighting, especially LED options, consumes significantly less energy than traditional lighting, leading to lower electricity bills and a reduced environmental footprint.
- Mood and Ambiance: With dimmable options and various color temperatures, you can easily set the perfect mood, from bright task lighting to a warm, cozy glow for entertaining.
- Increased Home Value: Thoughtful lighting installations are a desirable feature for homebuyers, potentially increasing your home’s market value.
Choosing the Right Under Cabinet Lighting for Your Home
Selecting the ideal under cabinet lighting involves considering your specific needs, the desired aesthetic, and the practicality of installation.
Determine Your Purpose and Placement
First, decide what you want your lights to achieve. For task lighting, position the lights closer to the front edge of your cabinets to maximize illumination on the countertop. For ambient or accent lighting, placing them closer to the back edge creates a softer glow against the backsplash.
Understand Power Source Options
Your choice of power source will significantly impact the installation process.
- Plug-in Lights: These are the most DIY-friendly option, simply plugging into a standard electrical outlet. They are easy to install and move but require an accessible outlet and careful wire management to hide cords.
- Battery-Operated Lights: Offering ultimate flexibility and no wiring, battery lights are perfect for renters or those seeking a temporary solution. They are simple to install with adhesive but require periodic battery replacement.
- Hardwired Lights: For the cleanest, most seamless look, hardwired systems connect directly into your home’s electrical system, usually controlled by a wall switch. While this offers consistent power and eliminates visible cords, it’s generally more complex and may require a licensed electrician, especially if you’re not comfortable with electrical work or local codes demand it.
Brightness and Color Temperature
- Brightness (Lumens): Consider the amount of light needed. For task lighting, aim for higher lumens.
- Color Temperature (Kelvin): This determines the “warmth” or “coolness” of the light.
- Warm White (2700K-3000K): Creates a cozy, inviting atmosphere, ideal for accent lighting.
- Neutral White (3500K-4000K): Best for task lighting as it provides clear, true-to-color illumination without being overly sterile.
- Cool White (4000K+): Brighter, more modern look, often used in contemporary spaces.
Features and Quality
Look for features like dimmability, which allows you to adjust the light intensity, and smart control compatibility for integration with home automation systems. When choosing LED strips, consider using aluminum channels with diffusers. These channels protect the LED strips, aid in heat dispersion for longer lifespan, and most importantly, diffuse the light to eliminate “hot spots” (individual LED dots) reflecting on your countertop, providing a smooth, continuous glow. Opting for reputable brands ensures better quality, performance, and longevity.
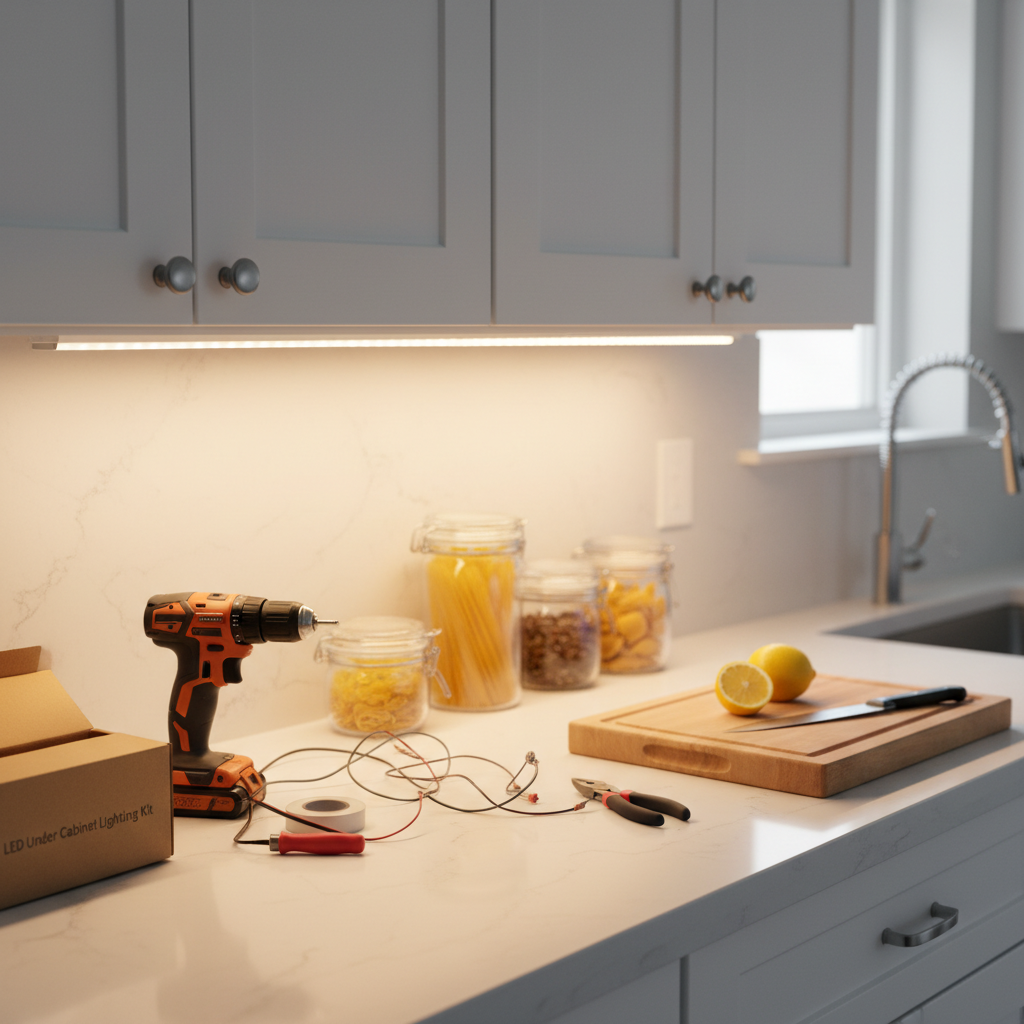
Essential Tools and Materials for Your DIY Project
Before you begin, gather all the necessary tools and materials to ensure a smooth and efficient installation.
Tools You’ll Need:
- Measuring Tape and Pencil: For accurate measurements and marking placements.
- Drill and Drill Bits: Essential for creating pilot holes and routing wires through cabinets.
- Screwdriver (Phillips and Flathead): For mounting fixtures and securing connections.
- Wire Strippers and Cutters: If working with wired systems to prepare electrical connections.
- Utility Knife or Scissors: For cutting LED strips (if applicable) and opening packaging.
- Level: To ensure straight, even installation of light bars or channels.
- Painter’s Tape: Useful for temporarily holding lights in place during planning or marking drill depths.
- Safety Glasses: Always protect your eyes when drilling or cutting.
Materials You’ll Need:
- Under Cabinet Lights: Your chosen LED strips, puck lights, or light bars.
- Power Supply/Driver: Required for most low-voltage LED systems to convert household current. Ensure it matches the voltage and wattage requirements of your lights.
- Connectors: For connecting multiple LED strips or light bars (e.g., solderless connectors, jumper cables).
- Extension Cables: To bridge gaps between cabinets or reach the power source.
- Mounting Hardware: Screws, adhesive backing (often included with strips), mounting clips, or aluminum channels with diffusers.
- Wire Nuts: For securing electrical connections (if hardwiring).
- Cord Clips or Adhesive Cable Covers: For neatly routing and hiding visible wires.
- Optional: Dimmer switch (for compatible systems), smart controller.
Step-by-Step DIY Installation Guide
With your tools and materials ready, let’s dive into the installation process. Remember to always prioritize safety by turning off power to the area if working with electrical wiring.
Step 1: Plan Your Layout and Measure
This initial step is crucial for a clean and effective installation.
- Measure Your Cabinets: Accurately measure the length of each cabinet section where you plan to install lighting. This will help determine the amount of lighting material needed.
- Determine Light Placement: Decide whether you want task lighting (closer to the front lip of the cabinet) or ambient lighting (closer to the back). Use painter’s tape or temporarily hold your lights in place to visualize the effect and ensure even illumination. For puck lights, aim for 8 to 12 inches apart to avoid dark spots.
- Identify Power Source: Locate the nearest electrical outlet for plug-in lights or plan the wiring route for hardwired systems. Mark the entry and exit points for wires if they need to pass through cabinets.
Step 2: Prepare the Mounting Surface
A clean surface ensures proper adhesion and a lasting installation.
- Clean Thoroughly: Use rubbing alcohol to clean the underside of your cabinets where the lights will be installed. This removes grease and grime, ensuring strong adhesion for LED strips or mounting clips.
Step 3: Drill Necessary Holes (If Applicable)
If you’re running wires between cabinets or into an upper cabinet for a hidden power supply, you’ll need to drill holes.
- Mark Drill Points: Using your measurements from Step 1, mark the precise locations for any holes needed to pass wires.
- Drill Pilot Holes: Use a drill bit slightly larger than your wire gauge. To prevent drilling entirely through your cabinet or causing splintering, wrap painter’s tape around your drill bit to mark the desired depth. Drill slowly and carefully.
Step 4: Install the Lighting Fixtures
This step varies slightly depending on your chosen lighting type.
- For LED Strip Lights:
- Cut to Length: If your strips are cuttable, trim them to fit each cabinet section at the designated cut marks.
- Attach Connectors: If using solderless connectors, carefully align the copper pads of the LED strip with the connector pins and snap them securely into place.
- Mount Strips: Peel back the adhesive backing and firmly press the LED strips onto the cleaned underside of the cabinets. Work in sections, pressing down firmly as you go. For added durability and diffused light, install them into aluminum channels first, then mount the channels.
- For Puck Lights or Light Bars:
- Mount Fixtures: Align the mounting caps or brackets according to your planned layout. Mark pilot holes with a pencil.
- Secure with Screws: Drill shallow pilot holes (use the tape trick!) and then secure the fixtures with screws, being careful not to overtighten.
Step 5: Wiring and Connecting Power
This is where your lighting system comes to life.
- Connect Lights: Link multiple light sections using connectors or extension cables as needed. Ensure all connections are secure and polarity (positive to positive, negative to negative) is correctly matched.
- Connect to Power Supply/Driver: Wire your light system to the appropriate LED driver or power supply. If cutting and splicing wires, use wire strippers to expose the wires and secure them with wire nuts or Wago-style connectors, matching colors (e.g., black to hot, white to neutral, green to ground for AC wiring, or positive to positive, negative to negative for DC low-voltage).
- Hide Wires: This is key for a professional finish.
- Behind Cabinets: Route wires along the back edge of the cabinet underside, securing them with cord clips or adhesive cable ties.
- Inside Cabinets: Drill small holes to pass wires into the base of the upper cabinet, then run them discreetly behind shelves or through drilled holes in cabinet dividers.
- Aluminum Channels: Many channels have space to conceal wires.
- Behind Backsplash: If you have an exposed wall before a backsplash, consider routing wires there.
- Connect to Power Outlet/Switch:
- Plug-in: Simply plug the power supply into your chosen outlet.
- Hardwired: If you are not experienced with electrical wiring, it is highly recommended to consult a certified electrician for this step to ensure safety and compliance with local electrical codes. For DIY, this might involve wiring the LED driver to an existing switched outlet within a cabinet. Ensure the circuit breaker for the area is OFF before touching any wires.
Step 6: Test and Make Adjustments
The final step is to verify everything works correctly.
- Restore Power: Once all connections are secure and wires are neatly tucked away, turn the power back on at the circuit breaker (if applicable) or plug in your system.
- Test Lights: Check that all lights illuminate evenly and operate as expected (e.g., dimming functions).
- Final Adjustments: If you notice any uneven lighting or visible wires, make small adjustments to optimize the aesthetic.
Tips for a Professional Finish and Longevity
Achieving a polished look and ensuring your under cabinet lighting lasts requires attention to detail.
- Utilize Diffusers: As mentioned, aluminum channels with frosted diffusers are invaluable. They eliminate distracting “hot spots” (individual LED dots) reflecting on your polished countertops, creating a smooth, uniform light beam that looks custom-installed.
- Meticulous Wire Management: The difference between a DIY project and a professional installation often comes down to wire concealment. Use adhesive clips, zip ties, or channels to route wires discreetly along cabinet edges, inside cabinet interiors, or behind the backsplash. Drilling small holes for wires to pass through cabinets can keep them completely out of sight.
- Proper Power Supply Sizing: Always ensure your LED driver or power supply is correctly sized for the total wattage of your LED lights. An undersized power supply can lead to flickering, reduced brightness, and a shorter lifespan for your lights. An oversized one won’t harm anything but might be unnecessarily expensive.
- Consider a Dimmer: A compatible dimmer switch or controller adds significant functionality, allowing you to fine-tune the brightness for various tasks and moods. Ensure both your lights and power supply are dimmable.
- Regular Cleaning: Keep your lights and diffusers clean. Dust and grease can accumulate, diminishing light output and efficiency. A quick wipe-down with a damp cloth will maintain their brilliance.
“Many DIY-friendly under cabinet lighting solutions are available, from adhesive LED strips to magnetic lights. For hardwired setups, if you’re not comfortable with electrical work, hiring a professional electrician is always recommended for safety and compliance with local codes.” – Lina Chen, Lighting Design Expert
Conclusion
Installing under cabinet lighting is a straightforward yet impactful DIY project that can dramatically enhance the functionality and aesthetic appeal of your kitchen. By carefully planning your layout, choosing the right lighting type, and following our step-by-step guide, you can achieve professional-looking results that transform your space. Remember to prioritize safety, especially when dealing with electrical components, and don’t hesitate to consult an electrician for complex hardwiring tasks. With a little effort, you’ll soon enjoy a beautifully illuminated kitchen that’s both practical and inviting.
Are you ready to brighten up your kitchen with the perfect under cabinet lighting solution?
Frequently Asked Questions
What is the best type of under cabinet lighting for DIY?
For most DIY enthusiasts, LED strip lights are often the best choice due to their flexibility, ease of installation with adhesive backing, and ability to be cut to custom lengths. Plug-in light bars and battery-operated puck lights are also very DIY-friendly options.
Do I need an electrician for under cabinet lighting?
For plug-in or battery-operated under cabinet lights, you typically do not need an electrician as they are simple DIY installations. However, if you opt for hardwired lighting that connects directly to your home’s electrical system, it’s highly recommended to consult or hire a licensed electrician to ensure safety and adherence to local electrical codes.
How do I hide the wires for a clean look?
To hide wires, you can run them along the back edge of the cabinet underside, secure them with adhesive cord clips, or route them through small drilled holes into the cabinet interior. Using aluminum channels with diffusers not only conceals wires but also provides a sleek, finished appearance.
What color temperature is best for kitchen under cabinet lighting?
For task lighting in a kitchen, a neutral white color temperature between 3000K and 4000K is generally recommended. This range provides clear, bright light that accurately renders food colors and is comfortable for detailed work, without being too warm or too cool.
How far apart should under cabinet puck lights be?
For even light distribution and to avoid noticeable dark spots, puck lights should ideally be spaced approximately 8 to 12 inches apart. It’s often helpful to lay them out temporarily with painter’s tape before permanent installation to determine the optimal spacing for your specific cabinets.